When creating a project, make sure you have configured your worksheet first (see the Step by Step Microsoft Project Tutorial).
Things to consider before you make a project schedule are:
Determining the Project Start Date
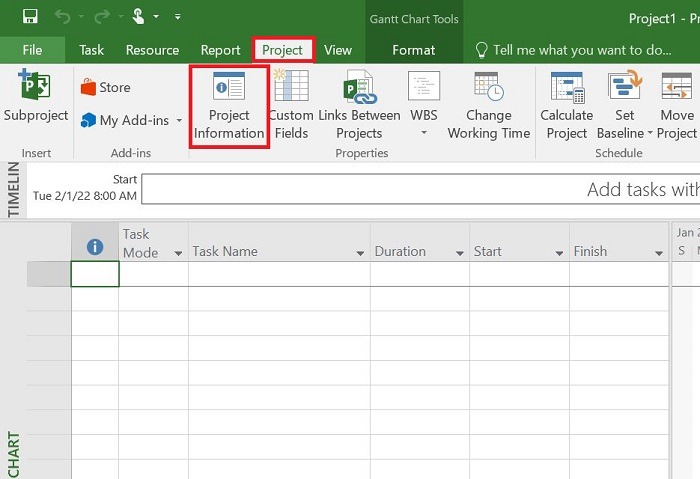
To specify a project start date, go to the following page:
Project -> Project Information
In the Project Information window:
- Enter the start date of your project in the Start Date field. In this example, we will fill in on March 31, 2022. If you have not created a project schedule (activity), the Finish date column will automatically fill in date data that does not describe the overall project duration. After the activity schedule data is filled in completely, the Finish date column will automatically be filled according to the Start date + project duration.
- Specify whether you want to calculate project date forward or backward by selecting Schedule from Project Start Date or Project Finish Date. If you choose Project Start Date, the Finish date column will automatically be disabled, and the Start date column will be enabled. On the other hand, if you select Project Finish Date, the Start Date column will automatically be disabled, and the Finish Date column will be enabled. In this example, we will fill in the Project Start Date option.
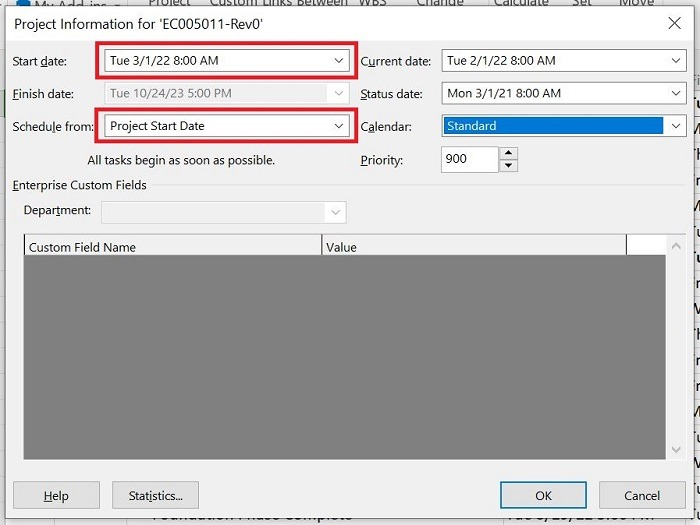
- If you already have a Calendar, enter your calendar options in the Calendar field.
The other columns you need to know are:
- Current Date: is today’s Date (Today).
- Status Date: The cut-off date or the Date when the data was updated.
After the filling is complete, click the OK button.


