What is a constraint: A constraint is a limit that can be placed on an activity in a project. For example, you want an activity to be completed before a certain date, or you want the Project to be completed before July 2024. You can provide a constraint on the activity level.
Examples of How to Use Constraints
For example, currently, from the schedule that you inputted earlier, the Project will be completed on July 5, 2024 (also, read about how to input activities schedule in Microsoft Project). Now, Management wants the Project to be completed on June 14, 2024.
You can find out what the last activity in the Project was on the critical path. To be able to filter the last sequence of activities on projects that are on a critical path, you need to filter with the following criteria:
- Critical.
- Activity without successor (last activity is the activity that does not have a successor).
To filter the last activity according to the criteria above, do the following filter method:
- Go to the View tab -> New Filter.
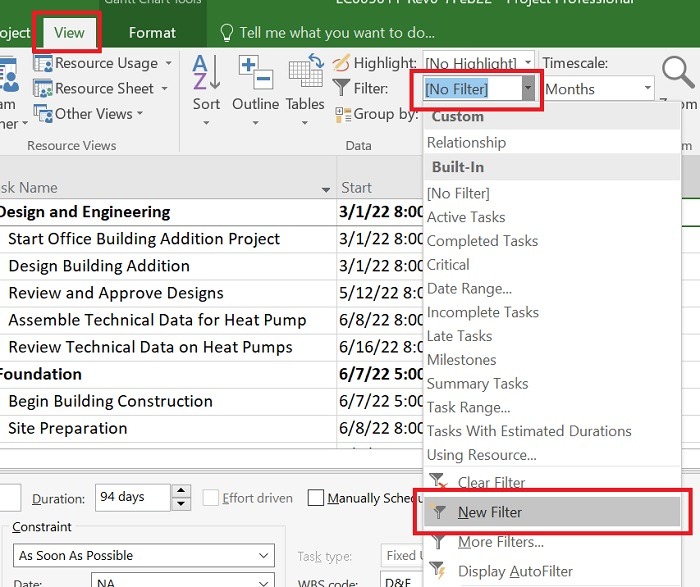
- In the And/Or column, select And.
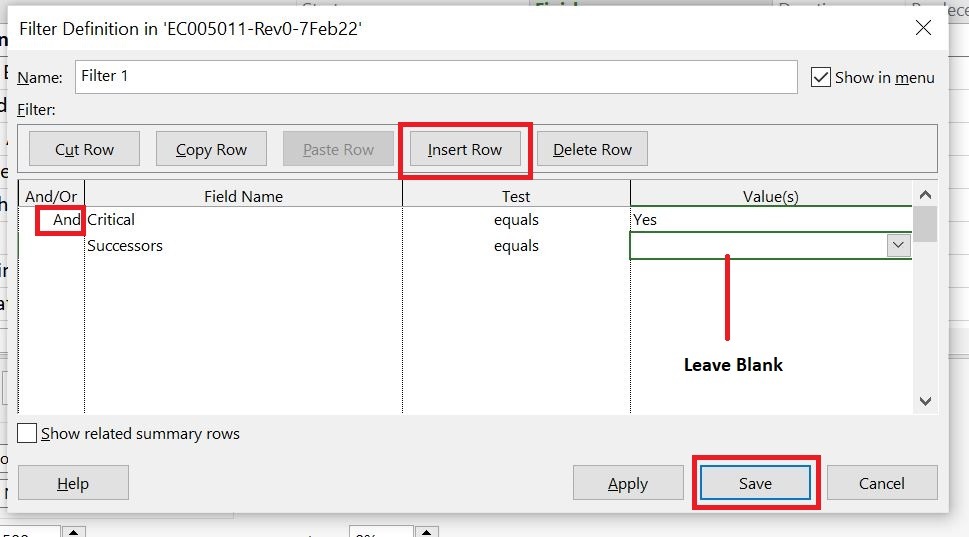
- In the Field Name column, select Critical. In the Test column, select equals. In the Value(s) column, select Yes.
- Next, to add another filter, click the Insert Row button.
- In the Field Name column, click the Successors option. In the Test column, click the equals option. In the Value(s) column, leave it blank, meaning that you will select the last activity (no successor).
Next, make sure the filter that you have created is selected in the filter column; the results are as follows:
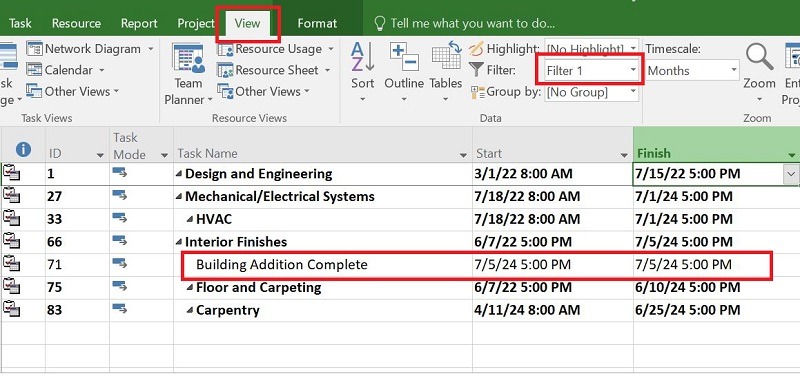
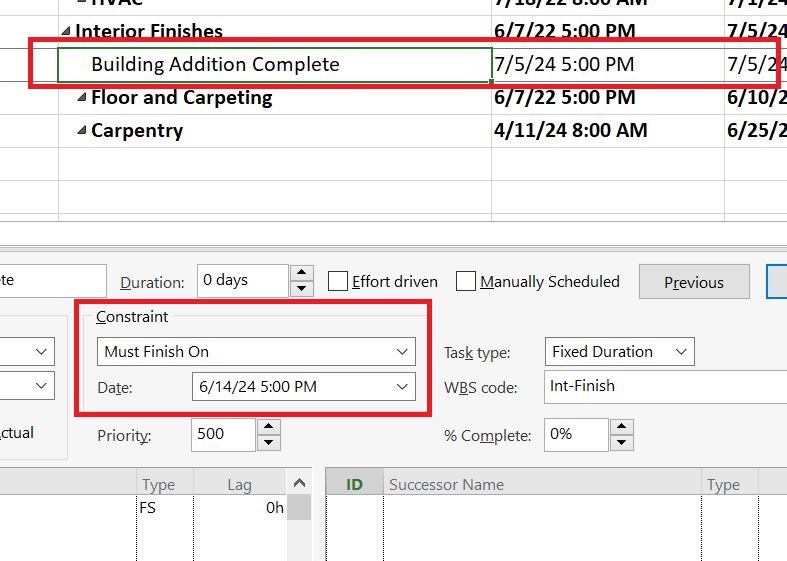
The Building Addition Complete activity is one that you filter as the last activity and is on the critical path.
Furthermore, as stated above, Management wants the Project to be completed by June 14, 2024. You can create a constraint on this activity. Previously, you needed to display the activity details window.
To display the activity details window, you can: Go to the Task tab -> click Details.
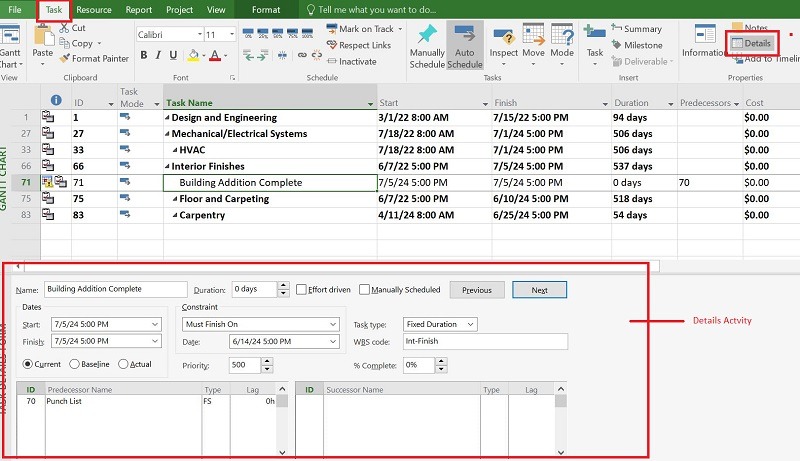
Then you can set a constraint on the activity detail window by selecting the activity first, then:
- In the constraint section, select Must Finish On.
- In the Date: column, select the desired date, it is June 14, 2024.
Now you’ve added a constraint to the last activity on the Project to reduce the project duration from what previously had to be completed on July 5, 2024, to June 14, 2024.
Automatically Total Slack on critical activities becomes minus 15.
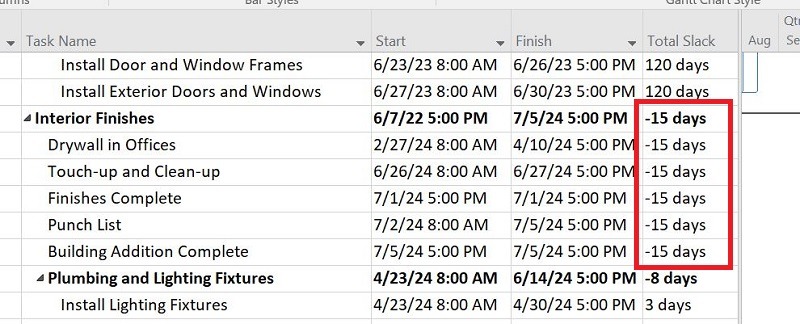
The Total Slack number is -15, meaning that you need 15 days of acceleration on critical activities to reach the target for the Project to be completed by June 14, 2024 (according to the constraints you gave in the last activity).
To accelerate, you can reduce the duration of some activities on the critical path with the smallest Total Slack value (-15 days).
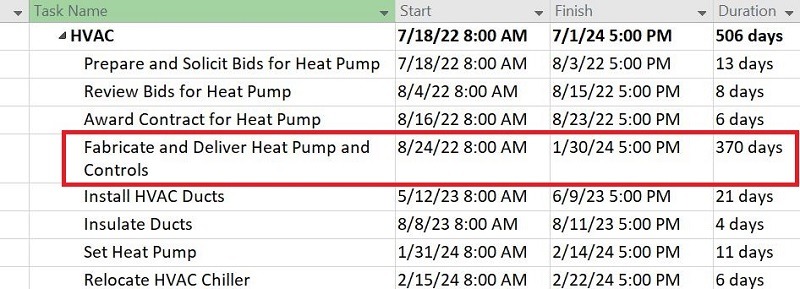
In this example, you could reduce the duration of the following activity to:
- Design Building Addition: from 48 to 42 days.

- Fabricate and Deliver Heat Pump and Controls: from 370 to 361 days.
Now Total Slack is back to zero (0). You can now check the completion date of your project on June 14, 2024 according to the change of plans.
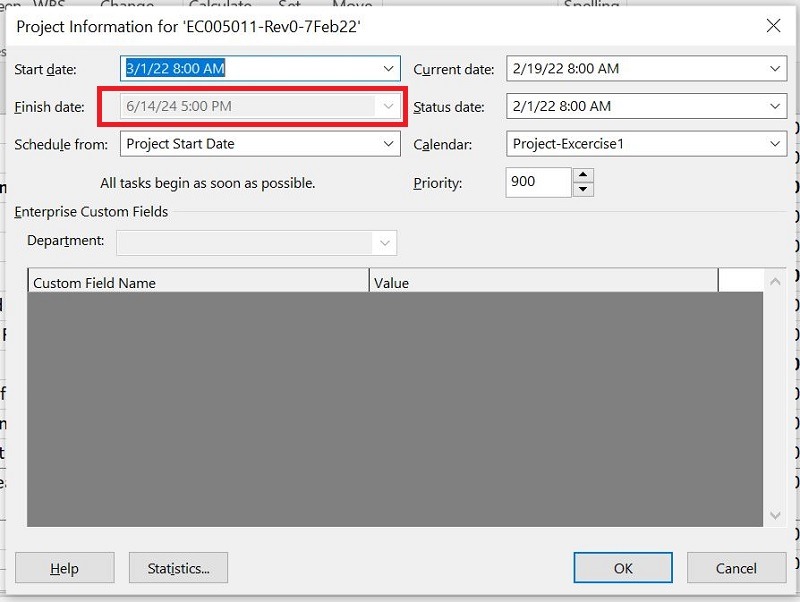
The last activity on your project, Building Addition Complete, is now also completed on June 14, 2024.
To speed up (reduce) the project’s total duration, besides reducing the duration of critical activities, you can also add a negative lag on successor activities to critical activities so that some of the periods of activities will take place in parallel.
Also, read about step by step scheduling tutorial with MS Project.
Different Types of Constraints
Some other constraint options are as below:
- As Late As Possible
An activity is scheduled to start and finish as late as possible without delaying the project or its successor activities.
- As Soon As Possible
This is the default constraint for activity in MS Project. When an activity has the As Soon As Possible constraint, the scheduling system will place the activity at the earliest available start time after all its predecessor activities are completed. The MS Project does not force a specific date; instead, it automatically calculates the earliest possible schedule.
- Finish No Earlier Than.
This constraint will limit the completion date of an activity so that it is not earlier than the constraint date you input.
- Finish No Later Than.
This constraint will limit the completion date of an activity so that it is not later than the constraint date you input.
- Must Finish On.
This constraint will limit the completion date of an activity so that it can be completed according to the constraint date you input.
- Must Start On.
This constraint will limit the activity’s start date to match the constraint date you input.
- Start No Earlier Than.
This constraint will limit the start date of an activity so that it is not earlier than the constraint date you input.
- Start No Later Than.
This constraint will limit the start date of an activity to be no later than the constraint date you input.
The thing to note is that once you have constrained an activity, you need to make sure that it doesn’t have a negative Total Slack.
If there are activities with negative Total Slack, it means that your schedule is not realistic. You need to make adjustments to the activity with a negative Total Slack so that the schedule becomes realistic.
Conclusion
The constraint is a way to give a date limit (start or finish) on activities to suit the needs in the actual condition or planning.
The following are the steps for assigning constraints to activities:
- Select the activity for which you want to constrain. If you want to speed up or extend the project’s duration, choose activities that are on the critical path.
- Provide constraints on activities.
- After the constraints are given, Microsoft Project will perform the schedule calculations automatically.
- See if any activity has a negative Total Slack (Total Float). Total Slack negative means that your schedule becomes unrealistic after adding constraints.
- If there is an activity with a negative Total Slack, make adjustments to the critical activity (which has a negative Total Slack) until the float is not negative.
- Schedule changes will occur when you finish making adjustments according to the constraints you want.


