The table below is an example of a table with activities that you can make as an exercise. It is recommended that you first read how to add OBS, EPS, Project, and WBS.

To create an activity, the first step that can be done is to go to the Activities page.
On the Activity page, click the Add button to add an activity. After that, the New Activity window will appear. The Activity ID is automatically filled with the default auto-numbering that we configured earlier (when creating the Project).
Activity ID can still be changed if needed. Continue by filling in the Activity Name field.
You can click the Finish button (fill in other data later) or continue to fill in the data by clicking the Next button.

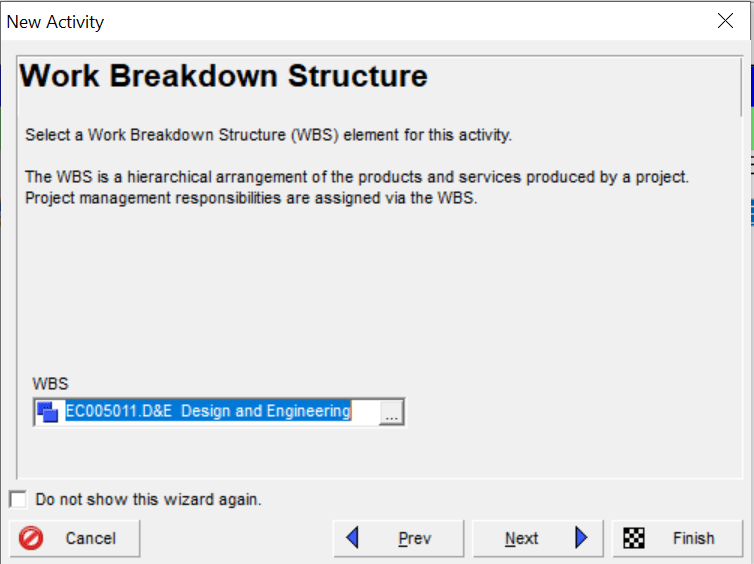
If you click the Next button, then select the appropriate WBS (see activity table above).
Next select Activity Type.
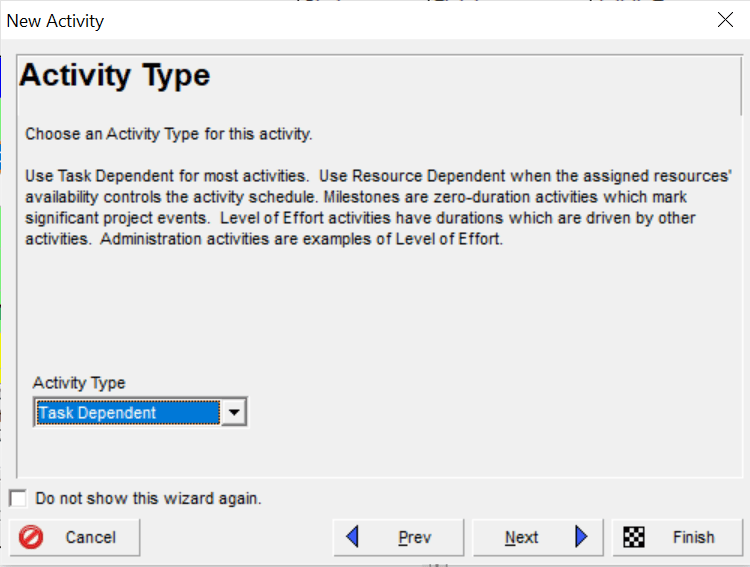
Then click Next. For now, ignore the Assign Resources option and click Next.

Next, select Duration Type. Select by default. Then click Finish.

In addition to the above method, you can also fill in activity data through Activity Details which you can display by going to the View menu -> Show on Bottom -> Details.

You can fill in the detailed data as shown below (go to the General tab):

Make sure all activities with type Task Dependent (in this example) use the following data:
- Activity Calendar: 5 days workweek w / basic holidays – practice
- Duration Type: Fixed Duration & Units
- Percent Complete Type: Physical, except for HP1290 and HP1310 using Percent Complete Type: Duration.
Make sure all activities with the type Start Milestone or Finish Milestone use the following data:
• Activity Calendar: 5 days workweek w / basic holidays – practice
• Duration Type: Fixed Duration & Units/Time
• % Complete Type: Physical, except for HP1290 and HP1310 using Percent Complete Type: Duration.
You can also use % Complete Type: Duration to prorate the Remaining Duration based on a percentage of the activity’s progress. Suppose your activity has an initial duration of 10 days, then the percentage of activity progress is 20 percent, then the Remaining Duration will be prorated 80% from the initial duration to 8 days.
Usually, % Complete Type Duration is used if you do not include resources in the project schedule or do not use a performance calculation method based on Earned Value.
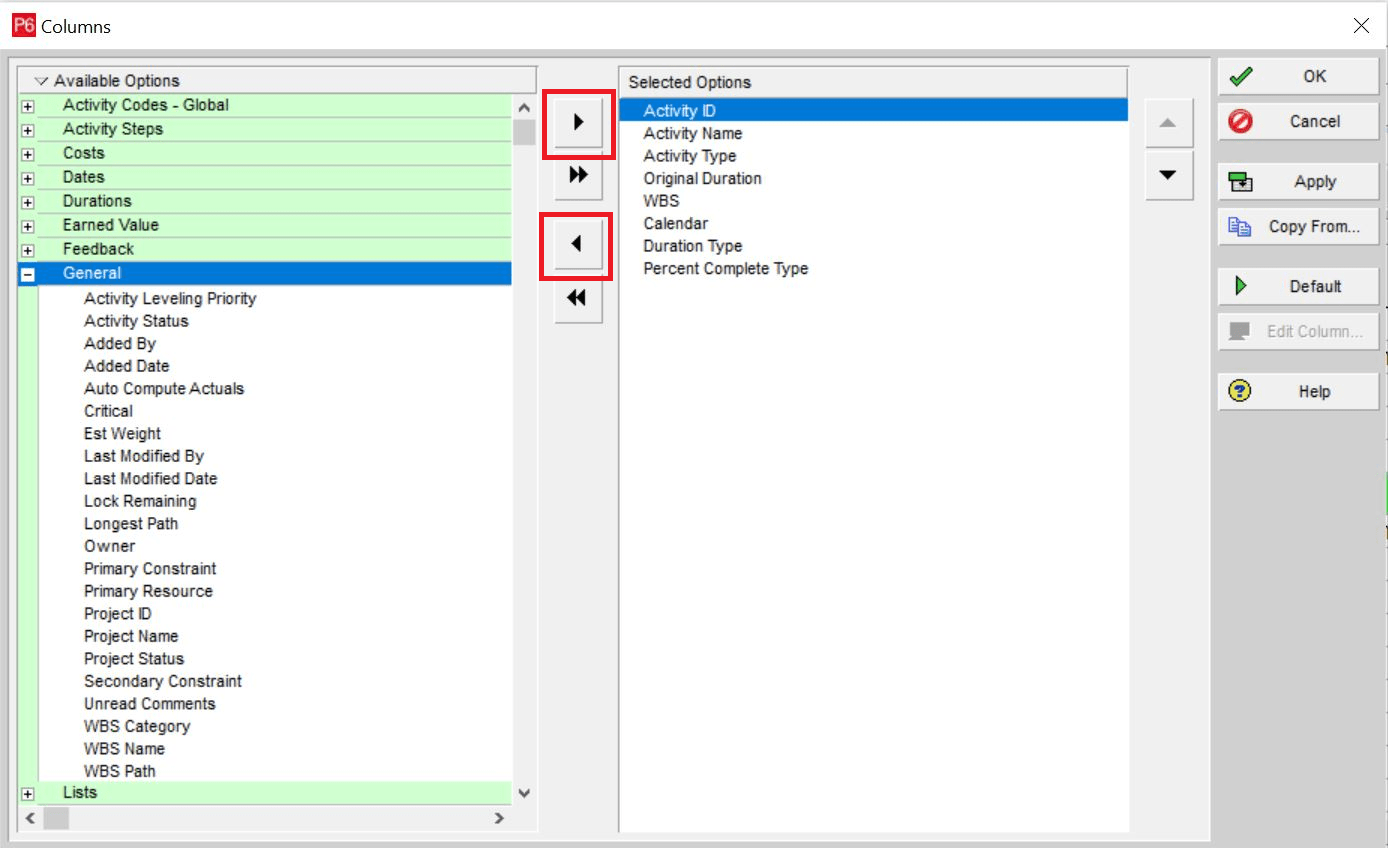
Alternatively, you can also fill in the detail data from the column in the activity table.
To display data fields, right-click on the table header and then enter each data field.

Move the column with the arrows right or left.
Continue to fill in the Activity data until it is finished, according to the activity table above. The result is as follows.


Also, read about how to filter activities data in Primavera.
Adding Activity Details (Step)
In Primavera, you can break down an activity into several more detailed activities. Suppose you want to break up Site Preparation activities into:
Site Preparation:
- Coordination with Authority
- Mobilization
- Install Fence
You also need to divide the weight of each job that has been detailed into (example):
Site Preparation (HP1100):
- Coordination with Authority (30%)
- Mobilization (30%)
- Install Fence (40%)
Total work weight 100%.
In primavera, you can divide it in the following way (also read about how to create activity steps):
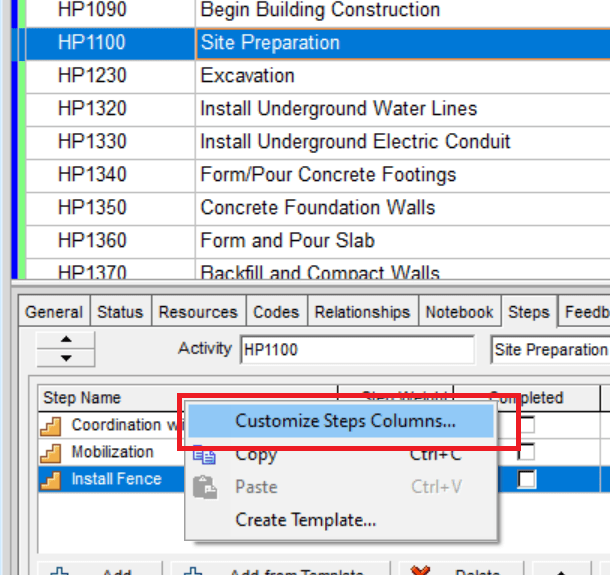
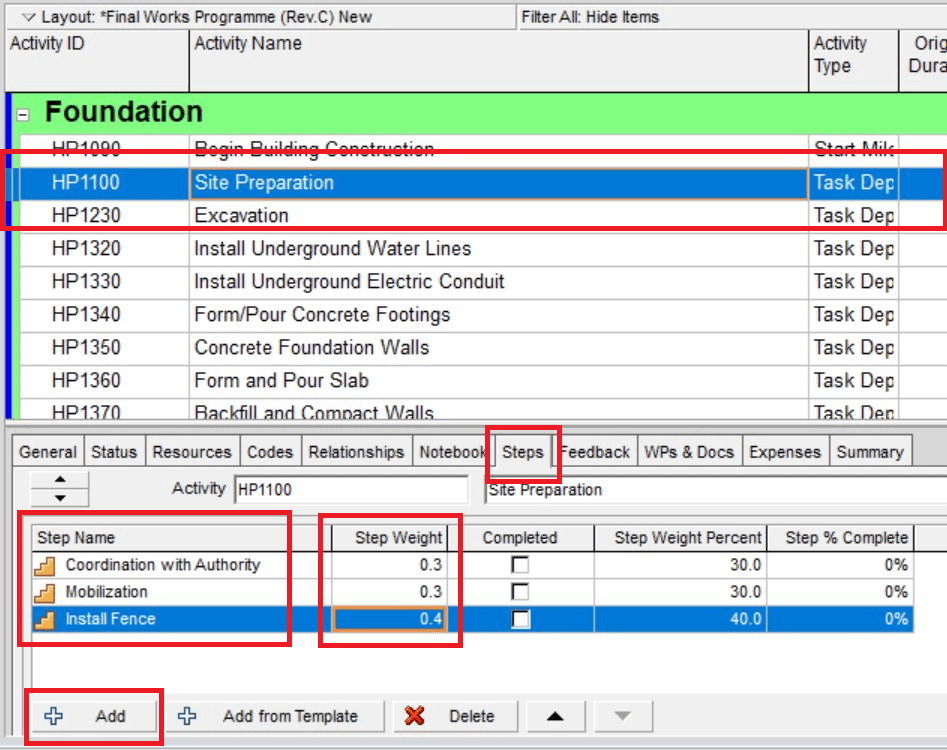
- Click on one of the activity which weight will be broken down; for example, click on Site Preparation (HP1100).
- In the activity details section, select the Steps tab.
- Click the Add button to add a Step (activity details).
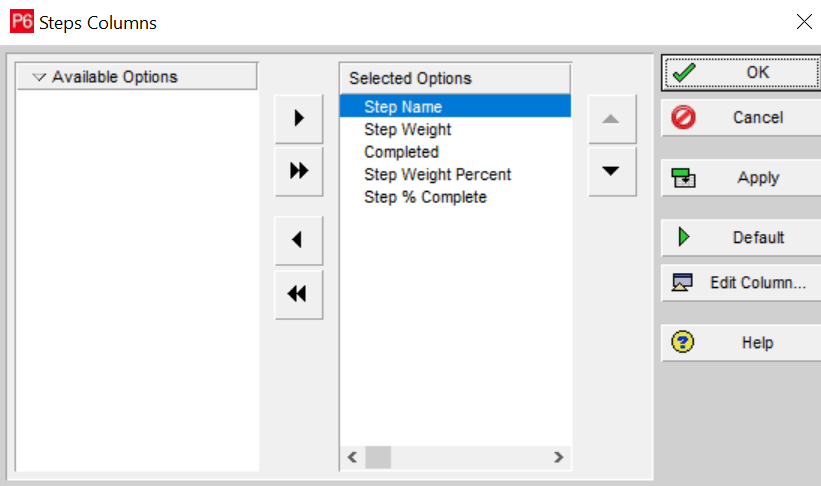
- Fill in the detailed activity name in the Step Name column. If the column does not already exist, you can add a column by right-clicking on the header of the Steps section. Click Customize Steps Columns…
Then select the column you want to display:
- Fill in the step weight in the Step Weight column. The step weight entry is adjusted to the weight of each activity step with a total of 100%. The picture below represents how to complete the steps in the Site Preparation activity:
Continue to read How to add Activities Relationship, How to Import Bulk Activities and Relationships with Excel File.

