For those of you who are new to Microsoft Project or have never used the project schedule tool before, you may be wondering, what is a calendar? Why do you need to create a calendar?
As an illustration, the following explains why you need to create a Project Calendar:
- Holiday dates in each country may vary. For example, on a country’s national holiday, the date of a religious holiday, etc.
- There is a possibility that certain projects have different working days from normal days.
- Calendar in Microsoft Project is still an international standard, so it does not accommodate holidays or working days according to certain countries.
- It is necessary to make a special date that is adjusted to the conditions of the Project.
- It is possible that the resource has a different calendar from the project calendar.
- Etc.
The above is a brief overview of why a specific project calendar is needed.
To create a project calendar, you must first determine how many days in a week and the number of hours worked per day. For instance, if you work 8 hours per day for 7 days a week or 5 working days with an 8-hour per day.
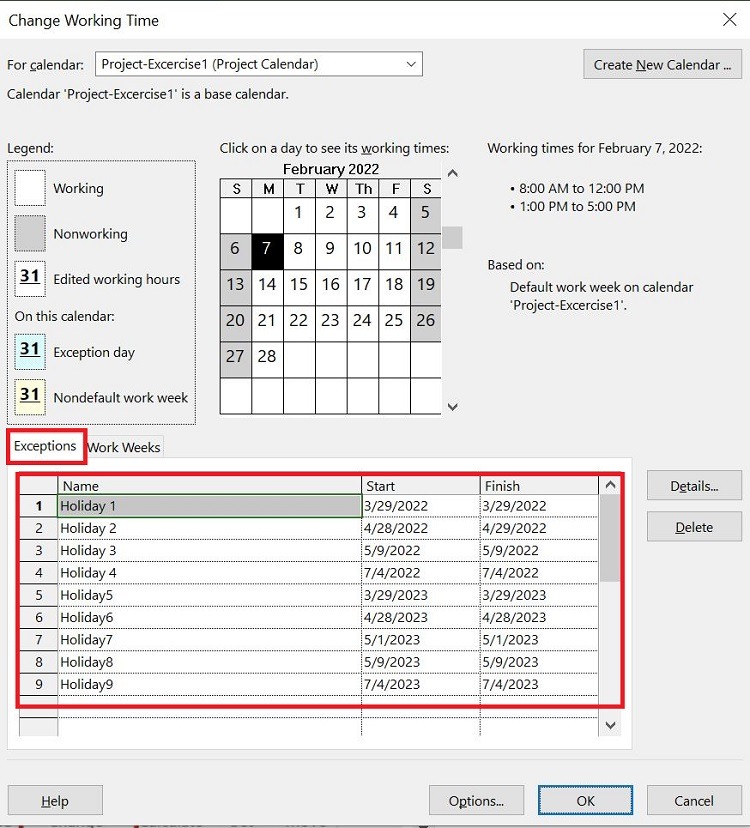
In this example, we will use a five-day workweek with an 8 hour day. The working hours per day are from 8:00 to 17:00. Holidays during the project are March 29, 2022, 28-29 April 2022, May 9, 2022, July 4, 2022, March 29, 2023, April 28, 2023, May 1, 2023, May 9, 2023, July 4, 2023.
Also, read about step by step tutorial Microsoft Project for beginners.
Create Project Calendar
To create a project calendar, do the following:
- Access the menu Project -> Change Working Time.
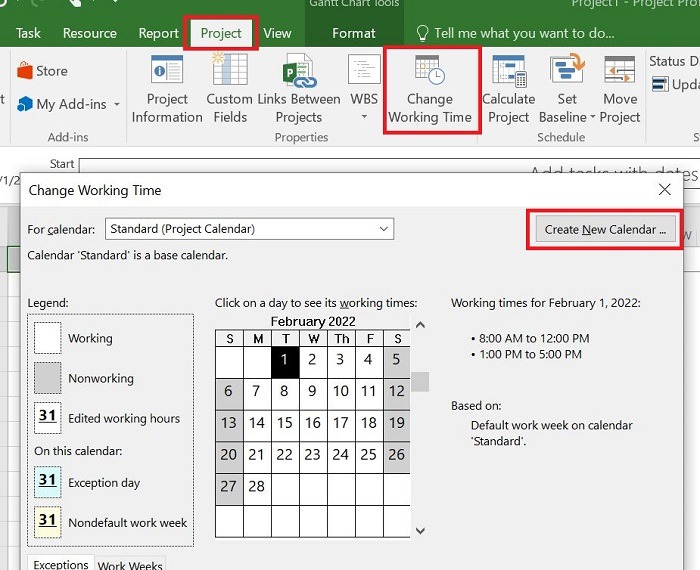
- In the Change Working Time window, to create a new calendar, you can copy it from an existing one and then edit it or create a new one without copying from the previous one. I suggest you copy from the Standard calendar and then edit it.
- Next, to continue creating a calendar, click Create New Calendar….
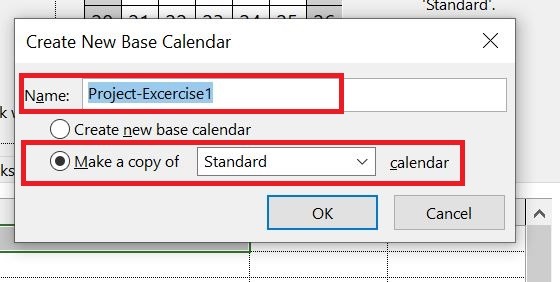
- Select Make a copy of Standard calendar. Name it Project-Excercise1, Click OK.
- Next, enter the number of days in the week and the hours worked per day. Click the tab Work Weeks -> Details…
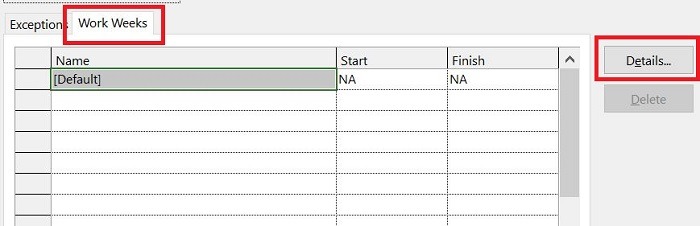
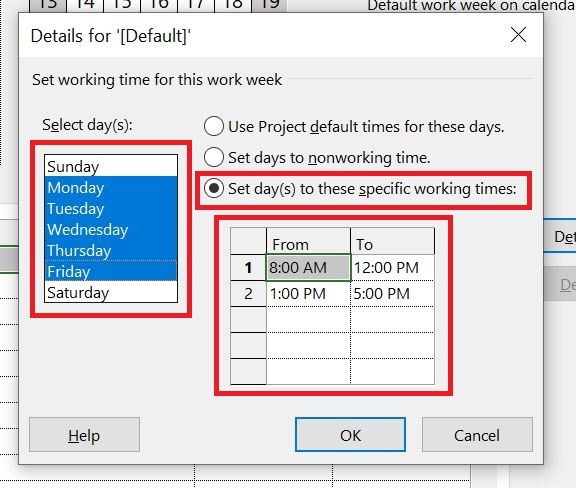
- In the Details for [Default] window, select Set day(s) to these specific working times. In this example, choose Monday – Friday. Enter the working hours 8:00-12.00 PM; 1 PM – 5:00 PM.
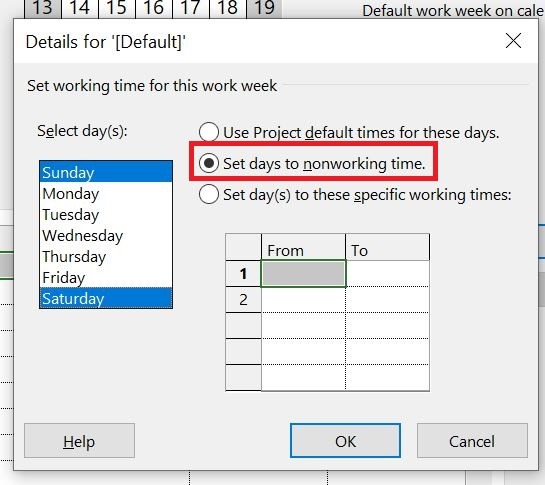
- For Sunday and Saturday, select Set days to nonworking time.
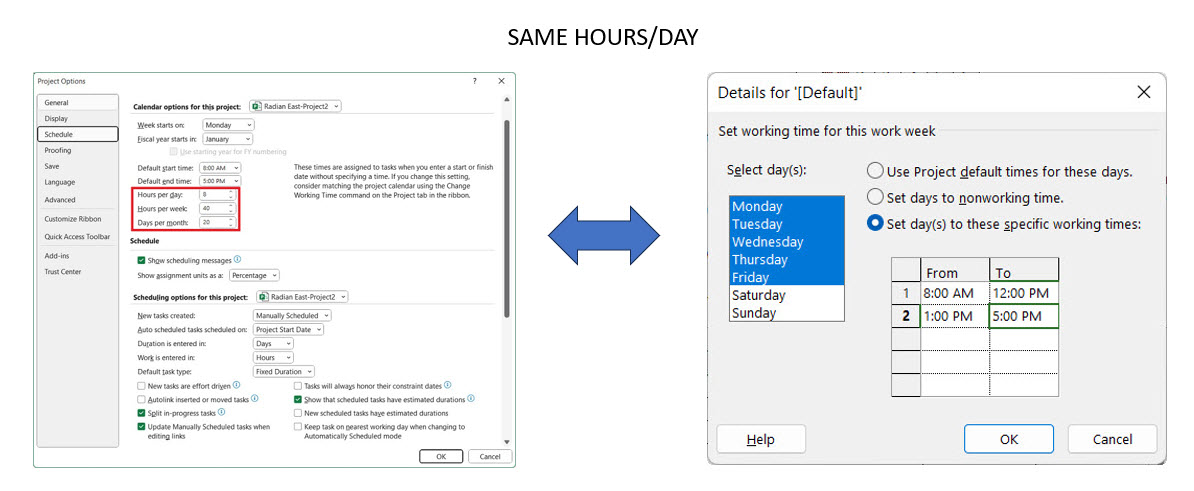
- You need to ensure the configuration in the calendar and the configuration in Project Options -> Schedule are the same. If you use the duration in days, then the number of hours per day (8 hours, in the example above) is the same as the hours per day in the calendar and the hours per day in Project Options -> Schedule. If you use the duration in weeks, ensure the number of hours per week is the same between calendars and Project Options -> Schedule. In the example, you’re using the duration in days, then the number of hours per day to consider, leaving the others at default.
- Click OK when finished.
- To enter holidays, select the Exceptions tab. Fill in the days off during the project as defined above.
- When finished, click OK.
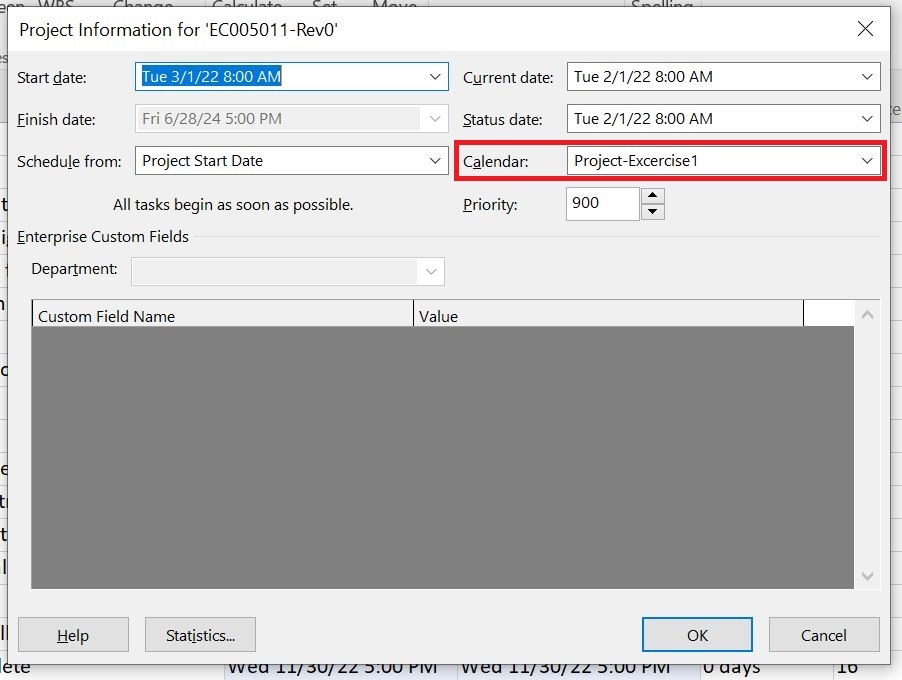
- Make sure you select the calendar you have created as the project calendar. To do this, go to the tab Project -> Project Information.
- In the Calendar field, select the calendar you have previously created.
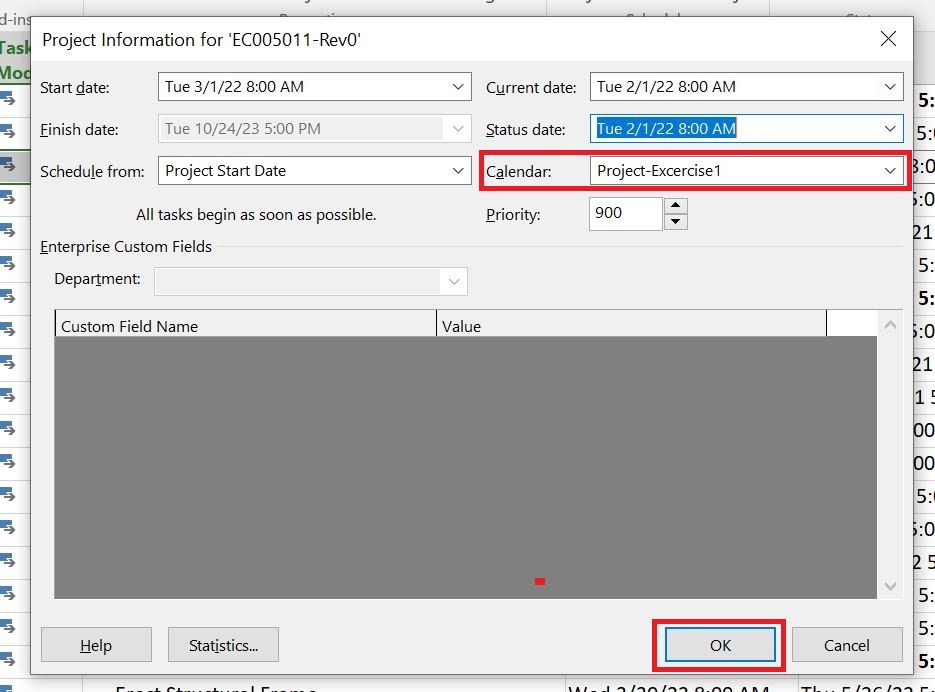
- This project calendar will be used by default when you add a new activity. You can change with other calendar options if needed.
Note: If the Task Calendar option in your project is None, the Activity uses the calendar selected as the project calendar in Project Information.
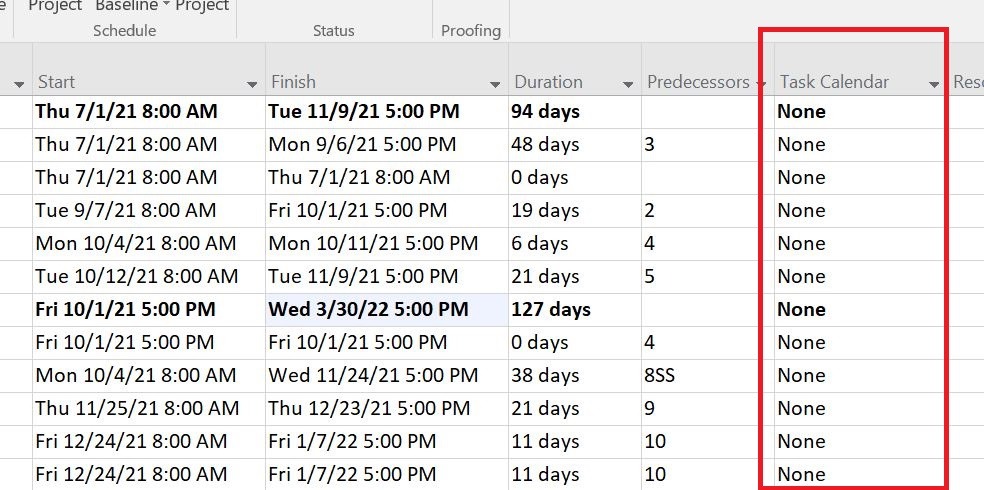
The calendar used is as below: