After the Primavera application is installed on your computer, then to access it, you can do the following:
- If you are using Windows 8 or 10, go to Start Menu > Oracle – Primavera P6 > P6 Professional 19 (x64). I’m currently using Primavera version 19, 64 bit.

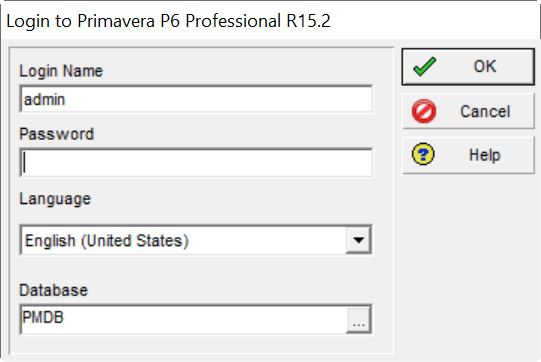
- To login, fill in the Login Name and Password fields, then click the OK button.
- When you log in for the first time, you will be shown the following message:

- Then click OK.
- Then, you need to set the Industry type so that the message doesn’t appear every time you log in.
- To select the type of Industry, go to the menu: Admin -> Admin Preferences…
- Select the Industry menu.
- Select the type of Industry that suits your project, then click Close.
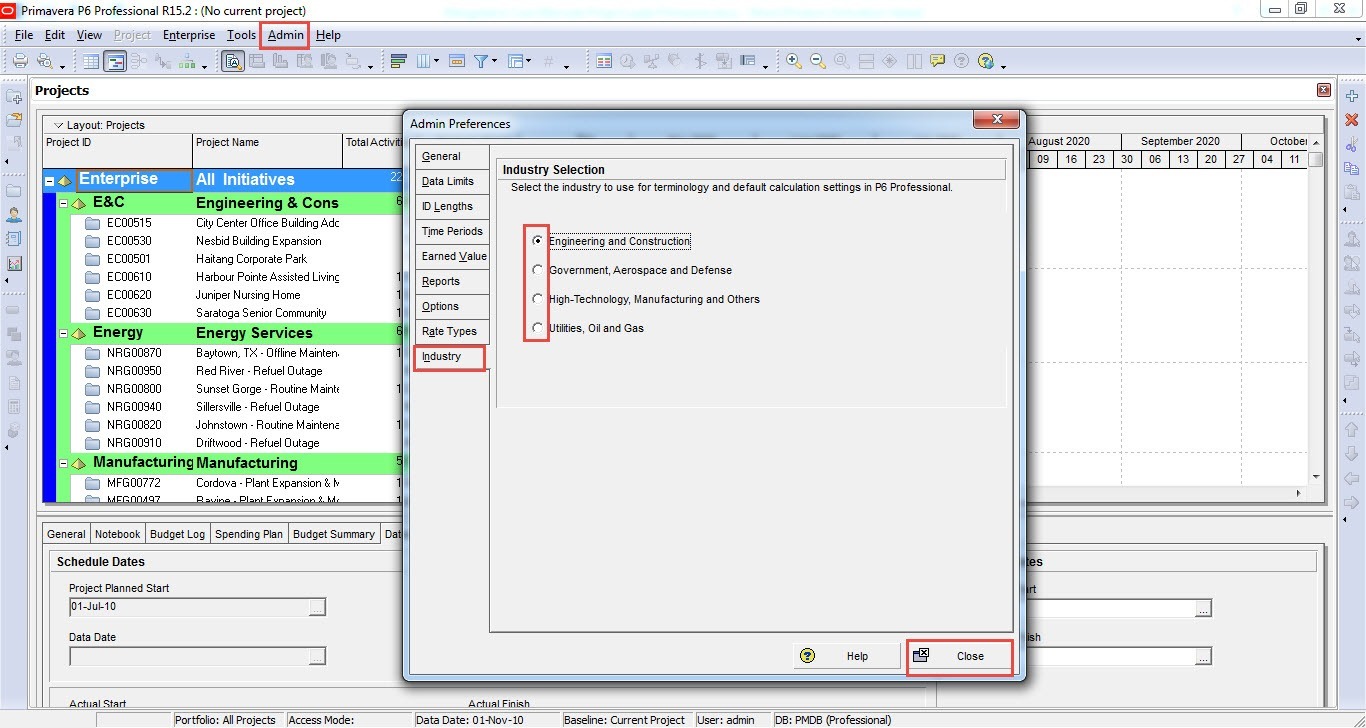
The Industry Type you select will affect the calculation terminology and default configuration of Primavera.
Here are some choices of Industrial Types on Primavera and the terminology used:
- Engineering and Construction: Determines the use of terminology and default settings for calculations aligned with the engineering and construction industries.
- Government, Aerospace, and Defense: Determines the use of terminology and default settings for calculations aligned with government and with aerospace and defense industries.
- High Tech, Manufacturing, and Others: Determines the use of terminology and default settings for calculations aligned with high-technology, manufacturing, and other industries.
- Utilities, Oil, and Gas: Determines the use of terminology and default settings for calculations aligned with the utility, oil, and gas industries.
| Industry Type | Industry Terminology Examples | Default startup window in P6 Professional |
| Engineering and Construction | Budgeted Units Budgeted Cost Original Duration | Activities window |
| Government, Aerospace, and Defense | Planned Units Planned Cost Planned Duration | Projects window |
| High-Technology, Manufacturing | Planned Units Planned Cost Planned Duration | Projects window |
| Utilities, Oil, and Gas | Budgeted Units Budgeted Cost Original Duration | Projects window |
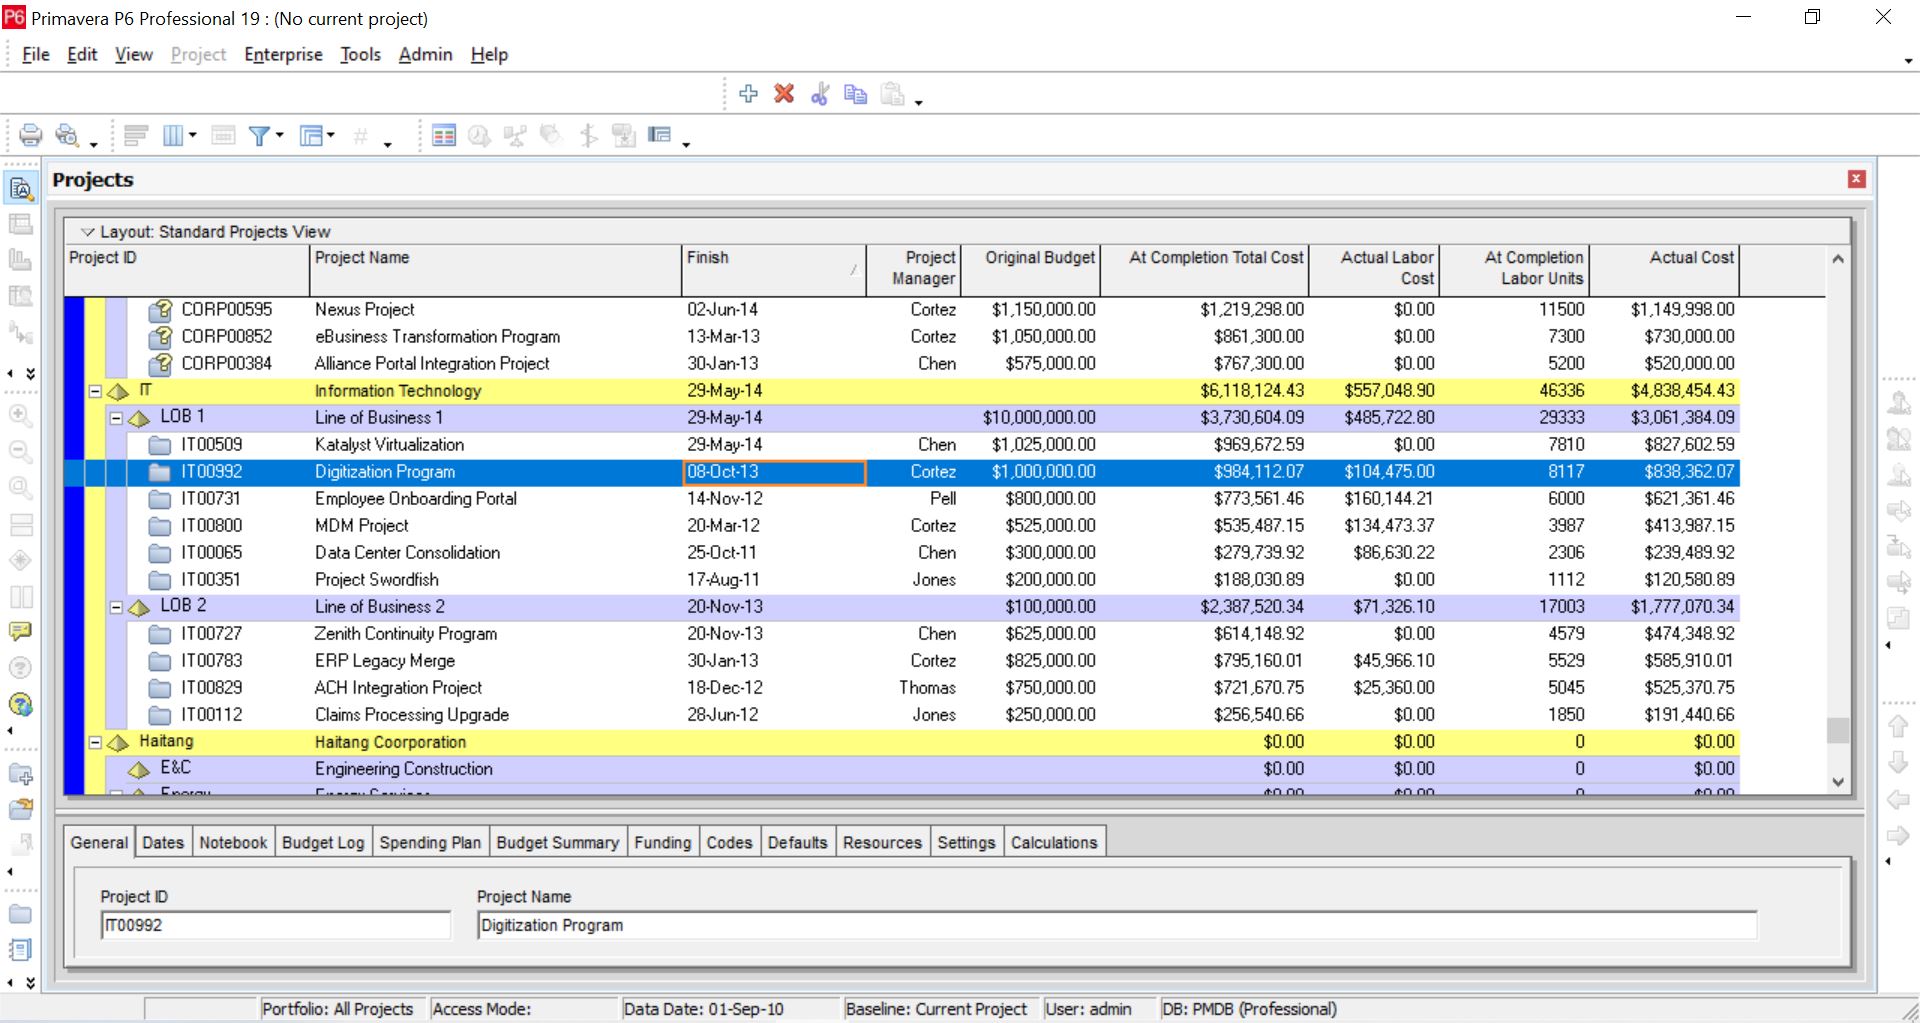
After logging in, the Primavera Home screen will display a list of EPS and Projects; on this page; a menu will appear at the top and side:
If you go to the activities page, the main menu will also appear at the top and side:

- Title Bar
- Menu Bar
- Project Toolbar
- Directory Bar
- Options Bar
- Gantt chart
- Command Bar
- Split Bar
- Activities Details
- Status Bar
- Table
Next, you can follow the Primavera Tutorial step by step, starting from defining OBS, creating a project schedule, saving the baseline, updating the actual schedule to monitoring the schedule.
This tutorial is also included sample data in the form of an activity table.
The following is a sequence of Tutorials that you need to follow in understanding the Scheduling Process in Primavera (click one):
- How to create OBS.
- How to create EPS.
- How to add Projects, Create Project Calendar.
- How to create WBS.
- How to Add Activities: Activity Type, Duration, Assign WBS.
- How to Add Activity: Relationship.
- How to Schedule (Scheduling).
- How to add Constraints on Projects and Activities.
- Create and Save Schedule Baseline.
- How to update actual progress.
- How to define Activity Codes.
- Working with Layouts.
To optimize understanding, please follow the sequence from start to finish.
Also, read about: Primavera P6 Training Jakarta.


