Microsoft Project is a schedule management application developed by Microsoft in 1984, originally based on MS-DOS OS.
A few years later released a windows-based application with the name Winproj. At the beginning of the release of the Windows version, Microsoft Project was released in 2 versions, standard and professional.
Although it is included in the large Microsoft Office family, Microsoft Project is not bundled with other office applications.
Today, Microsoft Project is accessible online if you purchase Office 365 Project Management Software.
Also, read about Microsoft Project features.
Microsoft Project Key Features
In general, the main features of Microsoft Project are features related to schedule management, there are as follow:
- Input Project Activities: Activities name, date, duration.
- Relationship between activities.
- Gantt Charts.
- Project Calendar.
- Constraints.
- Project Resources: Material, labor, cost.
- Calculation of the total project schedule automatically.
- Calculation of critical path with CPM method.
- Saving baselines (can be more than one baseline).
- Actual updates.
- Activity tracking.
- S-Curve view.
- Reporting.
- Filters.
- Create Formulas to display notifications.
- Etc.
Get to know Microsoft Project’s Interface and Elements (version 2016)
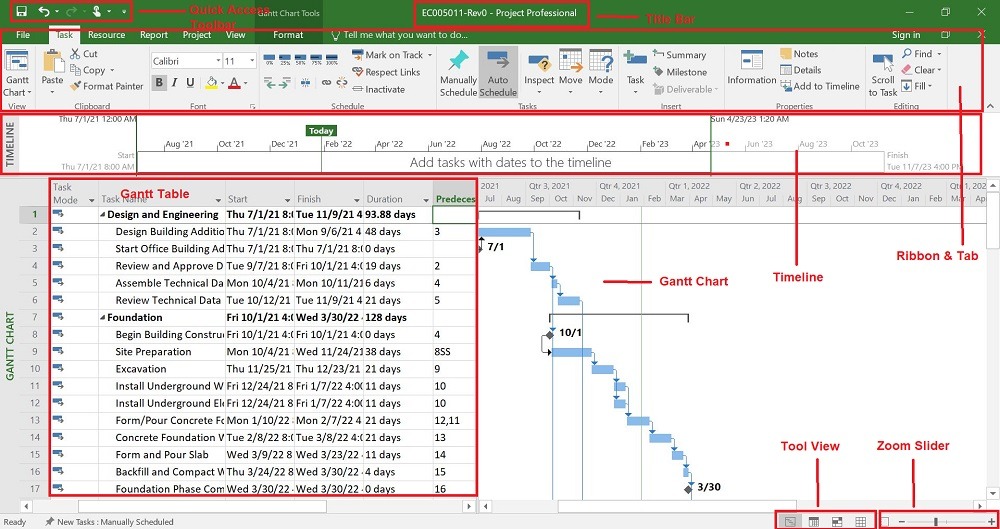
Quick Access Toolbar
It is the main button that can be accessed quickly with one click. You can enter various buttons in the File, Task, Resource, Report, Project, View, Format menu on the Quick Access Toolbar.
To add a button, you can do the following:
- Go to the menu File -> Options -> Quick Access Toolbar.
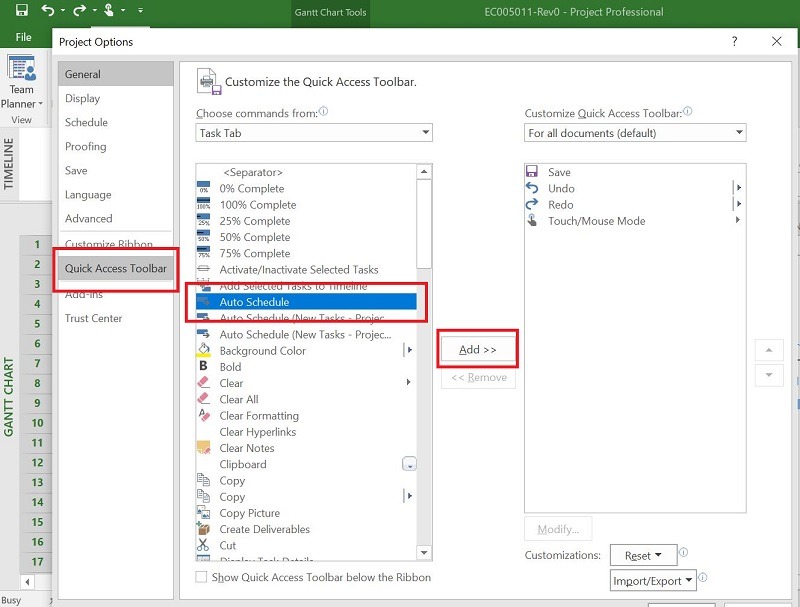
- Enter the desired button by clicking Add >>.
- You can also remove the button by clicking the << Remove button.
Title Bar
Displays Microsoft Project file name information that is currently active (open).
Ribbon and Tab
The Ribbon in Microsoft Project contains 6 main tabs: File, Task, Resource, Report, Project, View, and Format.
Within each tab, you will find command buttons divided into each group.
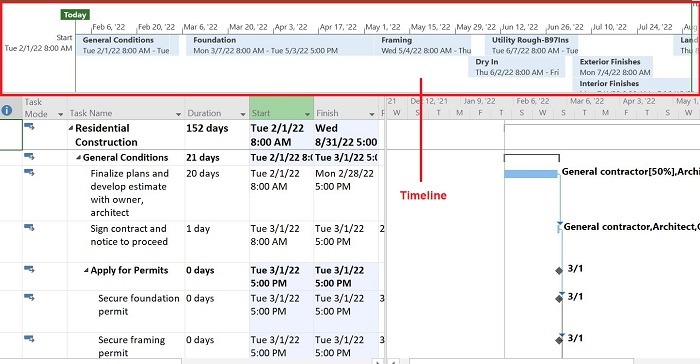
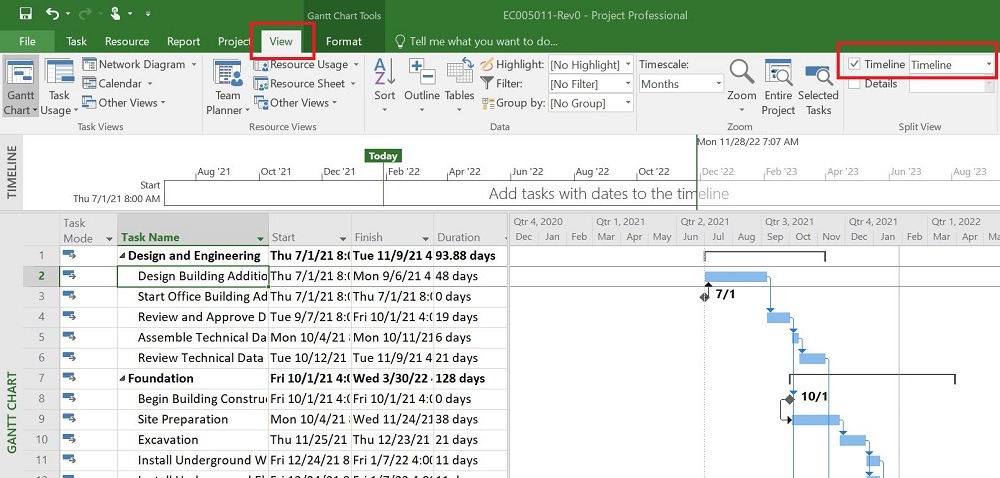
Timeline
The timeline displays the baseline schedule of the selected activity or WBS. The timeline can be scaled according to the period you want to show.
This timeline can be used for presentation purposes or to compare the baseline with the actual.
To show and hide the timeline, you can:
- Go to the View tab: Check or Uncheck the Timeline column.
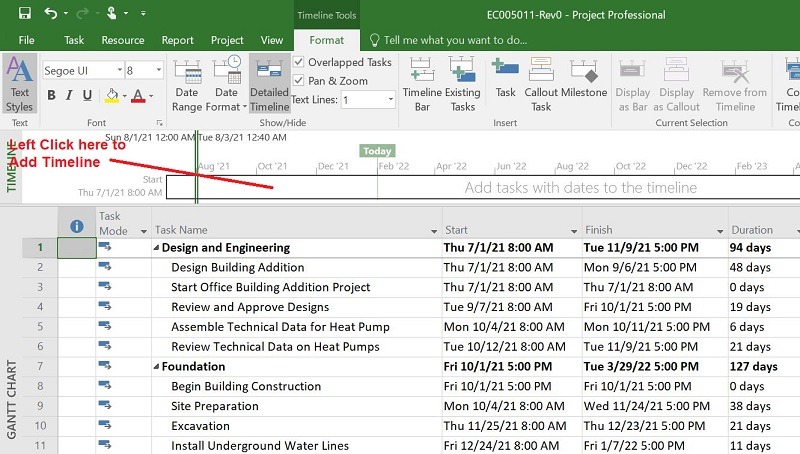
Left-click to display activities or WBS in the Timeline section:
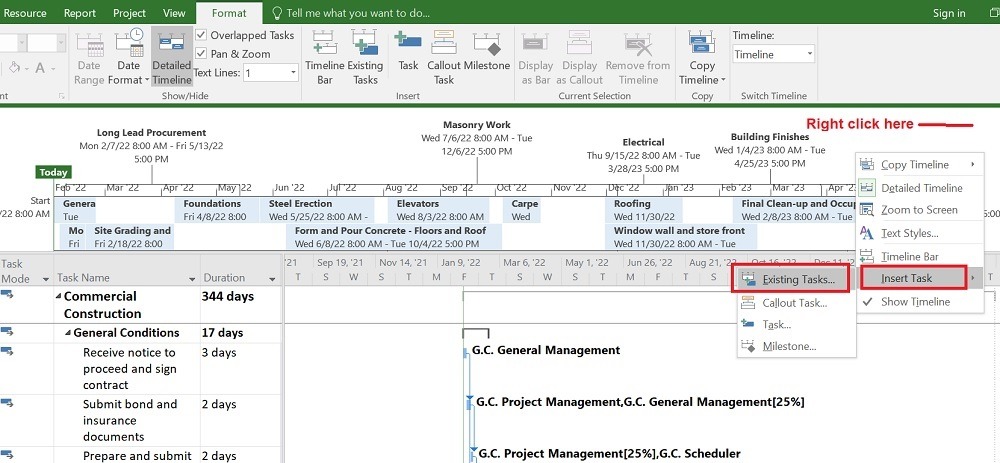
To edit, right-click on the white area in the timeline box:
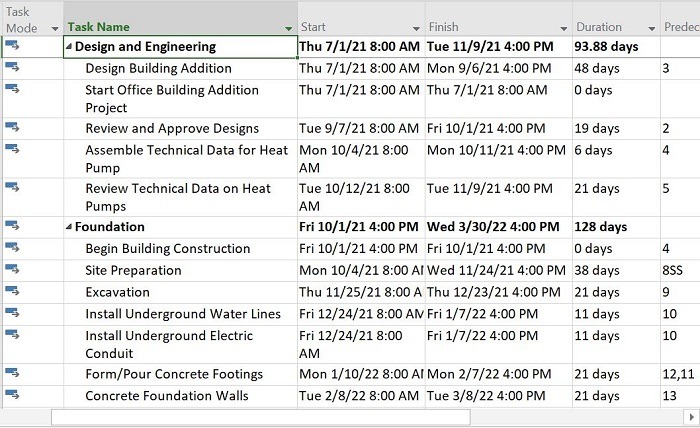
Gantt Table
This section is the main worksheet and will be displayed when you open the Microsoft Project Worksheet.
In this table, you can enter activities, including activity name, duration, relationship, resource, etc.
Gantt Chart
A section displays a bar graph that shows the duration of the work and the relationship between activities that have been entered into the Gantt table.
The Gantt chart is located side by side with the Gantt table on the right.
Tool View
The View tool is used to change the appearance of the Microsoft Project worksheet. Changed views include Gantt Chart, Task Usage, Team Planner, Resource Sheet, and Report.
Zoom Slider
This tool is used to enlarge or reduce the appearance of the worksheet.
Read also about Microsoft Project Training in Jakarta, Training Primavera.
Creating Project Schedule with Microsoft Project
The steps for making a project schedule are as follows:
- Setting Up / Configuring Microsoft Project Worksheets.
- Prepare Project Information.
- Create a Project Calendar.
- Create WBS, adding activities, creating activities relationships.
- Adding Constraints.
- Create a Baseline.
- View Critical Paths.
- Update actual.
How to Configure Microsoft Project Worksheets
Before entering activity data, it is important to configure your worksheet so that the scheduling is more efficient and the data displayed is according to the conditions of your project.
Configuring Default Options
Schedule Menu
Go to menu File -> Options -> Schedule.
You can specify the default view or calculations in the Schedule Menu in the following ways:
Configure: Calendar options for this project
At the Calendar options for this project, specify the beginning of the day of the week, the beginning of the month of the year, and so on as shown below:
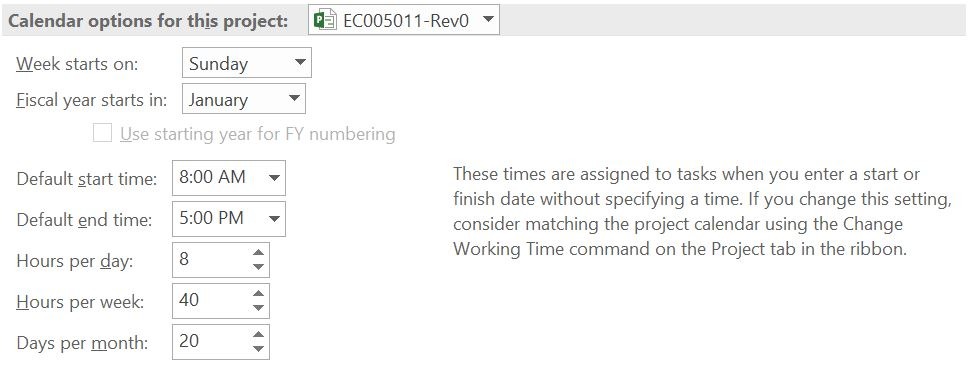
You can customize these options according to your Project Calendar.
Configure: Scheduling options for this project
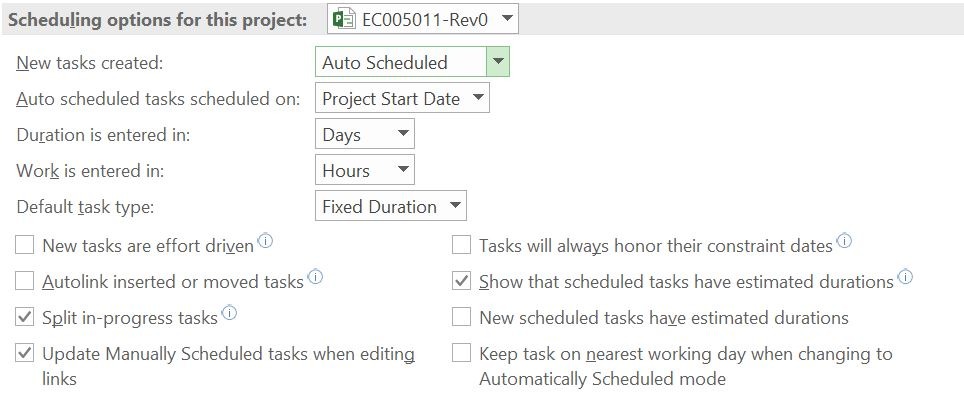
In this section, you can select the following configurations:
- New tasks created: Auto Scheduled
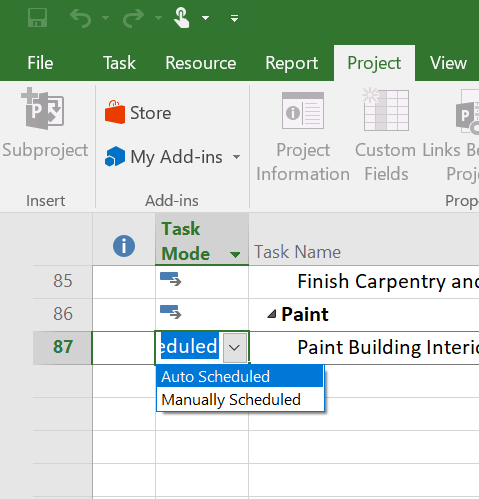
It is better by default, your Task Mode option will be Auto Schedule. This option is used to avoid manual calculation errors. If you want to change to Manually Scheduled, you can change this option in the Task Mode column of the activity.
- Auto scheduled tasks scheduled on: Project Start Date or Current Date.
This option will appear when you add a new Task.

- Duration is entered in: Minutes, Hours, Days, Weeks, Months. This is the duration of the Task.
- Work is entered in: Minutes, Hours, Days, Weeks, Months.
This is the working time for the Resource, usually in hours. For example, the duration of the 2-day Task is carried out by 1 worker with 8 hours of work per day. Then the time needed to complete the task is 16 hours (Work = 16 hours).
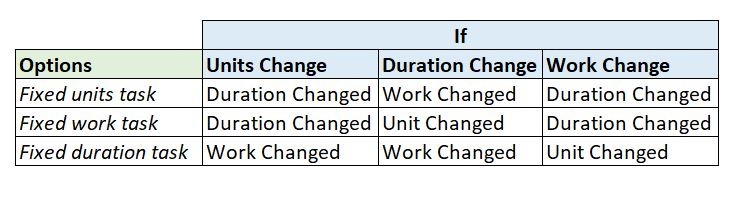
- Default task type: Fixed Units, Fixed Duration, Fixed Work.
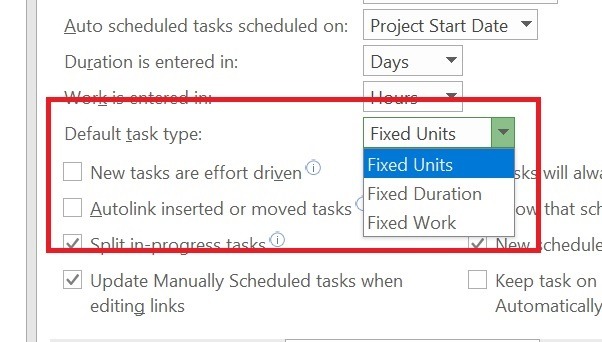
Fixed Units
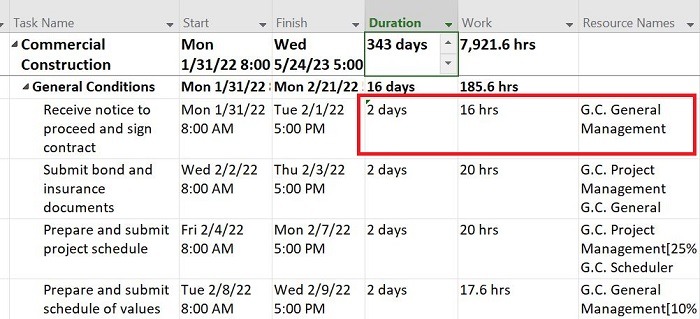
This option assumes that the number of units (e.g., 32 hours per day) allocated to the task is known and that it should not change, even if the duration varies. When the work on a task changes, so does the duration, but not the number of units.
Another Example: Suppose you have one resource assigned to produce a report that should take no more than two days to complete. If you decide that the reality of working on this report requires that the two days be extended across four calendar days, you can adjust the duration to four days without affecting the number of units assigned to create the report.
You’re unlikely to want more than one person authoring the report (e.g., 8 hours per day). In other words, you want the number of units (resource) to remain constant.
Fixed Work
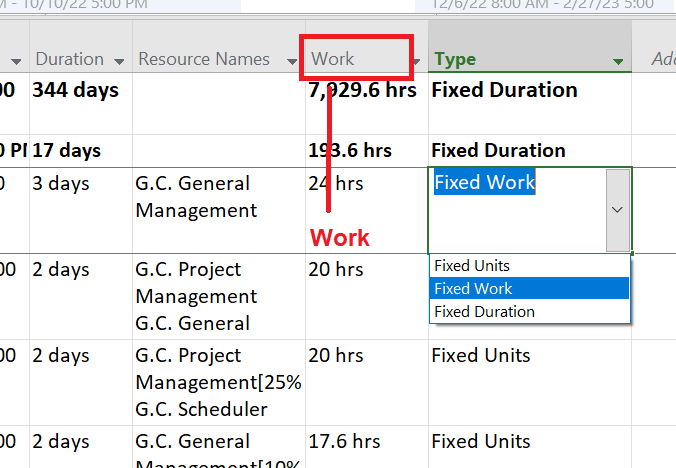
This setting assumes Work doesn’t change, even after changing the duration or adding resource(s). Use this configuration if you want to control the duration of a task by adding or removing resource(s).
Example: It takes 600 hours to design a sports building as part of a real estate project. And you want the building to be built as soon as possible, so you start assigning more architects to work (tasks). The duration of the design task will decrease as you add more people.
Note: You cannot change the effort-driven setting for Fixed-work tasks. The project does not consider Fixed work tasks to have a Work value that is flexible and, therefore, always Effort-driven.

Fixed Duration
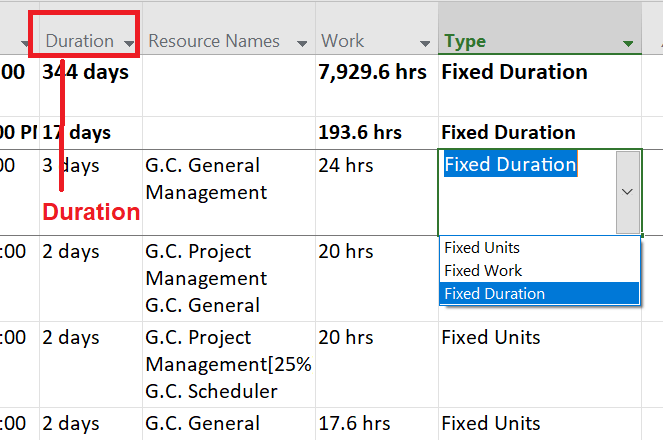
This setting assumes the duration does not change, even when more people are assigned to the task. Use this setting if you consider the duration of a task before knowing other information about the task.
Example: The weekly inspection meeting may take two hours. Set this task to a fixed duration; otherwise, the meeting duration will decrease when you add people to the task. And we all know adding people to a weekly meeting won’t reduce its duration.
Summary:
Configure: Calculation
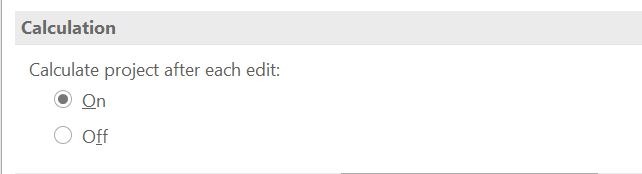
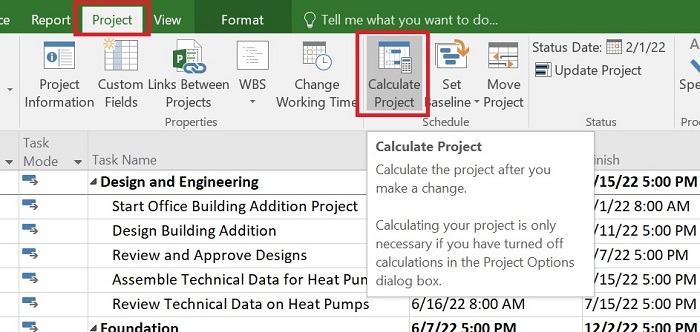
Choose On, if you want your Project to be calculated automatically after changing data. For example, if you change the duration of an activity that is on the critical path, the total project duration will change automatically.
If you choose Off, you need to click Calculate Project button, to calculate the total Project change (if any).
Configure: Calculation options for this project
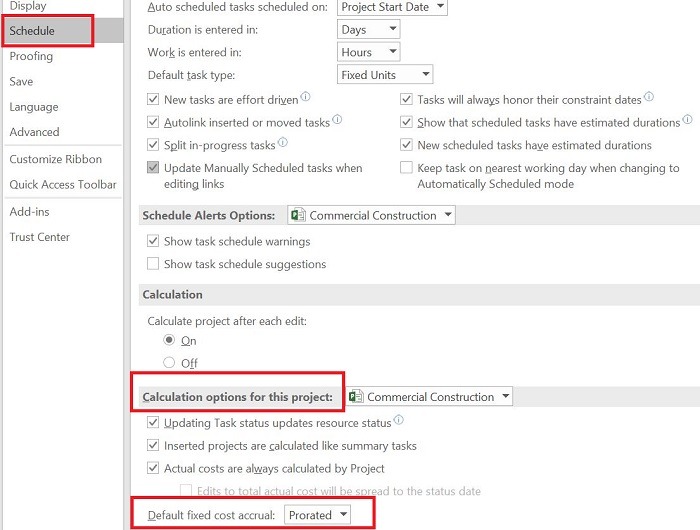
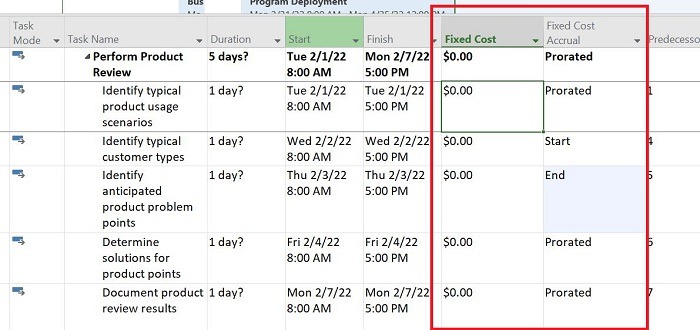
Default Fixed cost accruals: Start, Prorated, End.
There is a Fixed Cost column that shows any non-resource task expense.
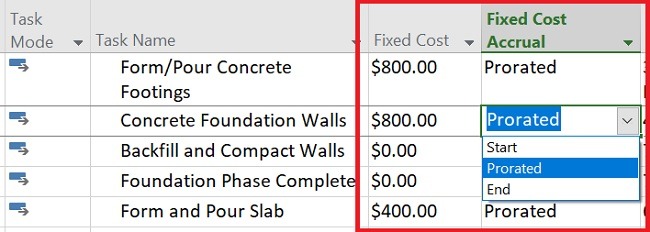
If you choose:
Start, then the actual Fixed Cost will be calculated when the activity starts.
Prorated, then the actual Fixed Cost will be calculated on a prorated basis according to the cut-off date.
End, the actual Fixed Cost will be calculated when the activity ends.
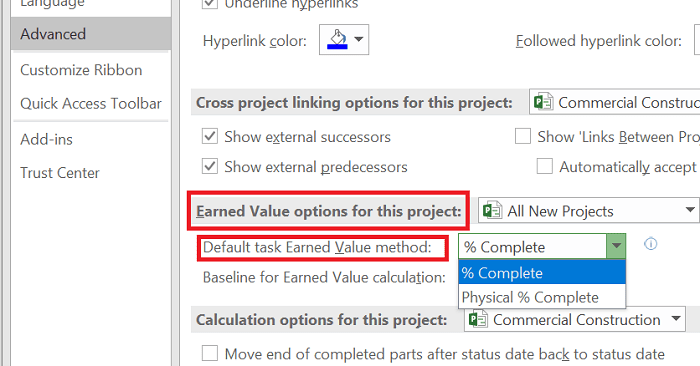
Advanced Menu
You can specify the default view or calculations in the Advanced Menu in the following ways:
Go to menu File -> Options -> Advanced.
You can configure the default Earned value method calculation. The method is as follows:
In the Earned value options for this project section, select Default task Earned value method: % Complete or Physical % Complete.