Data filtering is one of the important things that is often done when you analyze data using Primavera. A person’s expertise in analyzing is also usually accompanied by his ability to filter data.
There are many purposes for doing filtering, but some of the things I usually do the most important according to the demands of work and analysis are:
- To get the critical path of a certain milestone.
- To get the critical path of the entire project schedule.
- Filtering to display data for a certain period, for example getting the critical path for the next 3 months and 3 months back from the cut-off date.
- Filtering to display certain data (custom filter) using User Define Fields.
Actually, if you already know the principle or basic logic of filtering in Primavera, you can do any type of filter in Primavera.
Also, read about how to add activities in Primavera.
Basic Filtering in Primavera
Here’s how to filter primavera that you need to know:
- Right-click on the activity table, click Filters…

- By default, primavera has provided a filter in the Default section. You can add filters according to your criteria (custom) if needed, and this will usually be done often.

- In the Show activities that match section, there are two options:
- All selected filters: This option is selected if you want all filters to be executed with a logical AND. ‘AND’ means that all filter criteria must be met (intersected) to display the data. If one of the filter criteria is not met even though the other criteria are met, then the data will not be displayed.
- Any selected filters: This option is selected if you want all filters to be executed with a logical OR. ‘OR’ means that if one of the criteria is met (at least one criterion), the data will be displayed according to the fulfilled criteria—each filter criteria stand-alone (not intersect).
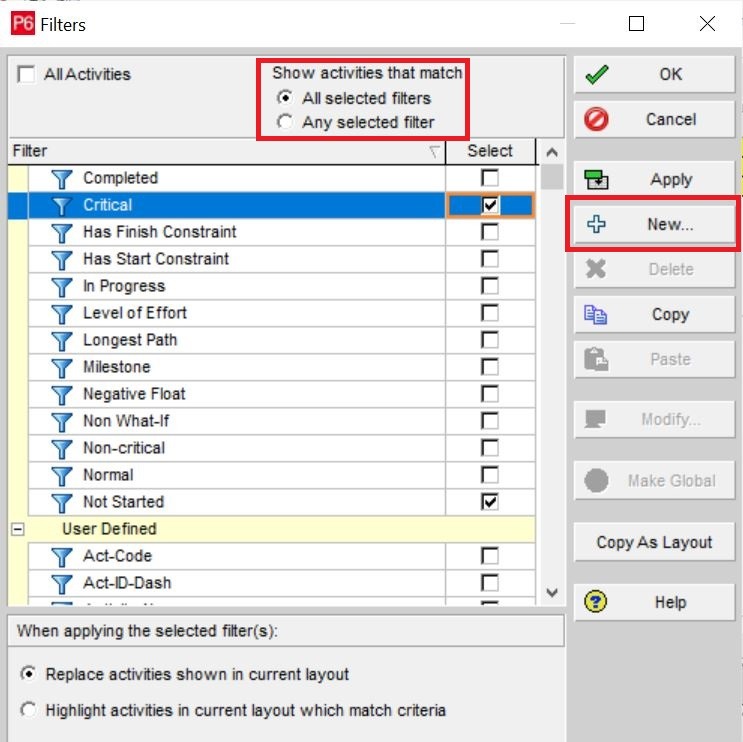
- You can select filter criteria by clicking on the checklist on the right.
- To add filter criteria that you define custom, do the following:
- Click the button New…
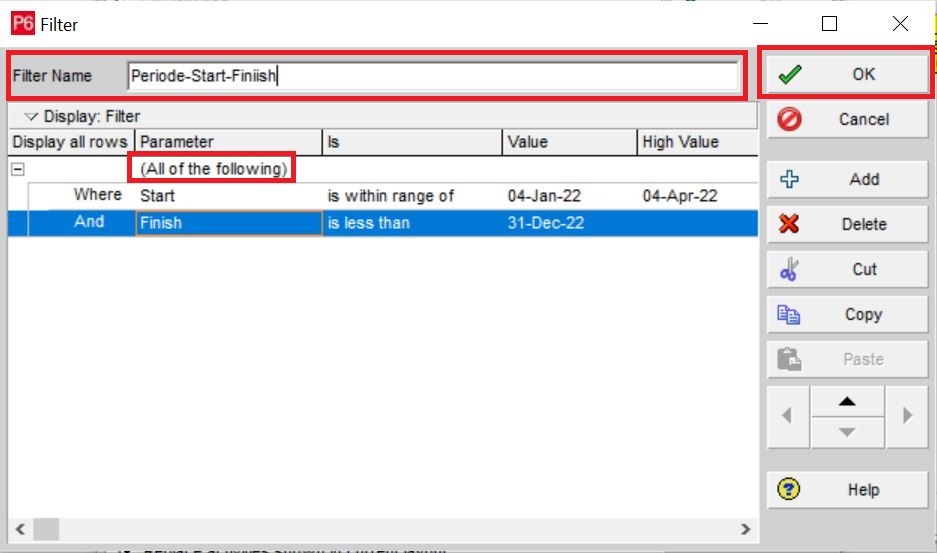
- In the Parameter column, there are options: (All of the following) if you want to use AND logic or (Any of the following) if you want to use OR logic. This will take effect if you have more than one filter criteria.
- Next, select the parameters you want to filter. For example, in my example, I choose the Start date.
- Next, in the Is column, select the desired filter terms or criteria. The example I chose in within range of.
- Next, in the Value section, fill in the filter value limit as in my example; I limited it to Value: January 4, 2022, and High Value: April 4, 2022.
- Then click Add (+) to add other criteria. In my example, I added a Finish date parameter limited to December 31, 2022.
- Do not forget to give a name in the Filter Name column.
- When finished, click the OK button.
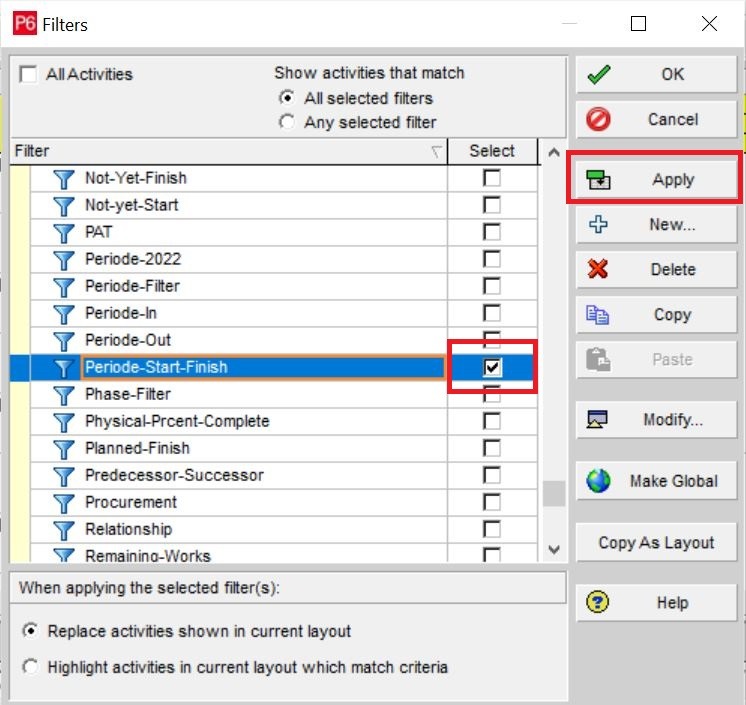
- To select the filter criteria you have created, click on the check box to the right of the criteria.
- Click Apply to have your data filtered according to the criteria.
Implementation of Filtering
Now you can do basic filtering. You can develop how to filter according to your needs.
Then as I have informed you above, as your practice now, can you do the filter according to what I usually do at work, as follows:
- To get the critical path of the entire project schedule.
- Filtering to display data for a certain period, for example, getting the critical path for the next three months and three months back from the cut-off date.
- Filtering to display specific data (custom filter) using User Define Fields.
- To get the critical path of a particular milestone.
Which of the above four filters that you can not do? Please answer in the comments column below!


