When working on the Activities page, you can customize the appearance of the page based on your ‘needs.’
The display format that you can configure on this Activities page is the table (what columns you want to display, font, color, line width, the filter used when opening the project, and so on), the format in the bar chart section (including color, data, number of bar charts, timescale, and so on), the format of the print preview (reporting), and so on.
After you have configured your Activities page to meet your necessities, you can save the configuration in the Primavera feature called Layout.
So, the next time you open your project with the Layout you saved, you can use the format you set up earlier. This can save you time because you won’t have to re-configure the appearance of the activity page.
To save the Layout, do the following:
- Open the project for which you will create a layout and go to the Activities page.
- Settings or configuration on the page, table section format (displayed data column, font, color, row width, etc.), bar chart (time scaling, barline, displayed data, etc.), print preview (time scale, paper size, page layouts, etc.).
- Open menu: View -> Layout -> Save Layout As…
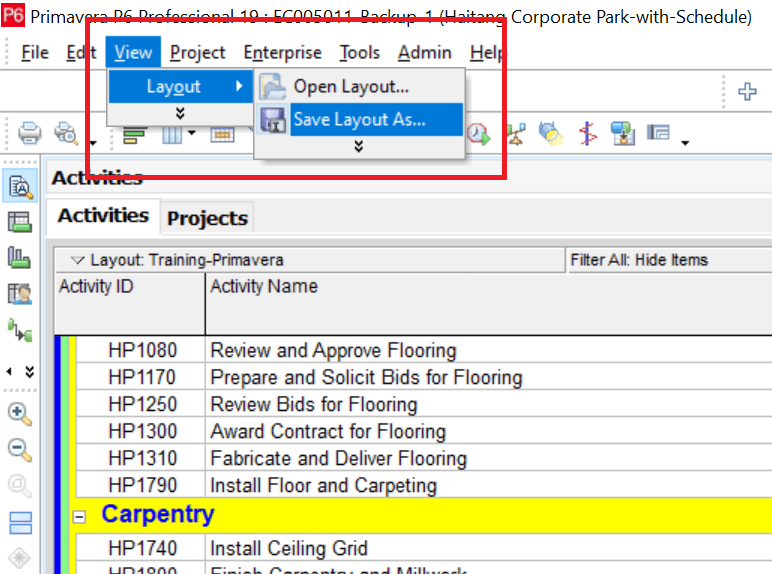
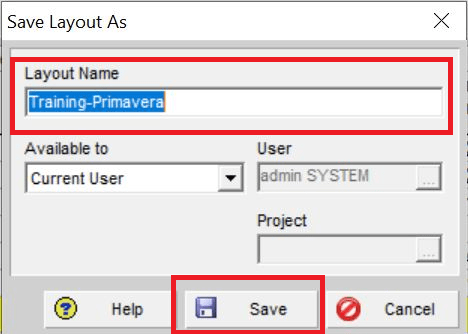
• Name the Layout, then save it by pressing the Save button.
You can reopen your saved Layout in the following way:
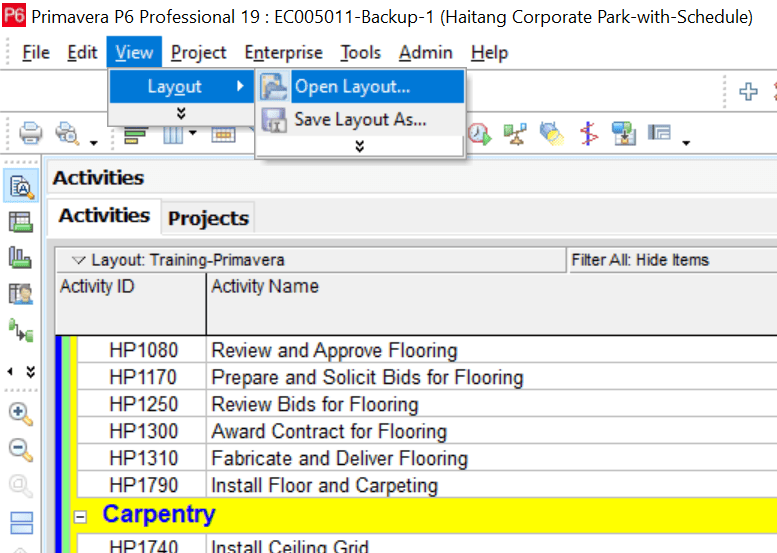
• Access menu View -> Layout -> Open Layout…

In the Open Layout window, select the Layout you saved earlier, for example, in the example Layout named Training-Primavera.

Import and Export Layouts
Export Layout
Suppose you have to open the Primavera file (*.XER file) on a different laptop or share a Project file with your coworkers. In that case, you can include a Layout if you have a customized configuration on the activity page.
If you do not include the Layout, the project display format on your partner’s activity page will vary depending on the user’s layout configuration (your partner).
To include a layout file, you can do this by first exporting the layout file. The way to export a layout file is as follows:
- Go to View menu -> Layout -> Open Layout…
- Then select the Layout you want to export; in my example, I chose a layout named Training-Primavera. After that, click the Export button.

- Save the File to your local computer by selecting the location first, name it and click the Save button.

When finished, the layout file will be saved with the extension *.plf.
Import Layout
If your colleague later has received the Primavera file that you sent along with the Layout, then to import the Layout that you sent, your partner needs to do the following:
- Go to View menu -> Layout -> Open Layout…

- Then, on the Open Layout page, click the Import button.

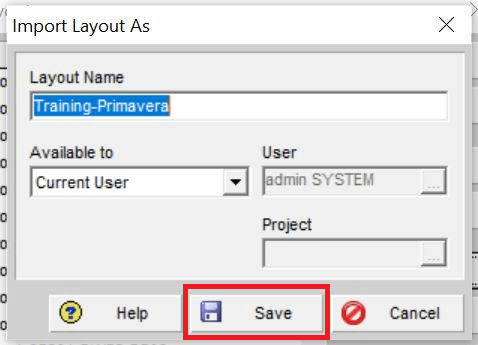
- Select the File to import.
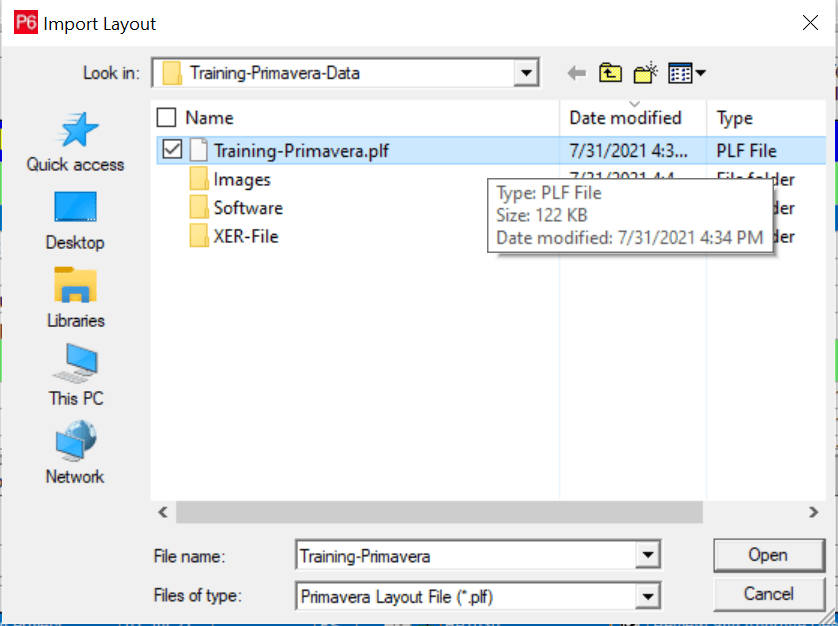
• Next, give the name and click the Save button to save, as shown below.