Primavera has a feature to save the schedule (Baseline) that you have created.
If there is a change, you can save again the plan you have made, so that you can compare the changes at a later time.
To create a baseline, do the following:
- Open your Project.
- Go to the Project menu -> Maintain Baselines…

- In the Maintain Baselines window, click the Add button.
- Next, select Save a copy of the current project as a new baseline. Another option is if you want to add the Baseline of the project in a different folder. Currently, you only need to add a baseline from the project you are now opening.
- Then click OK.

- You can then change the Baseline Name and choose a Baseline Type.

These fields and options are for informational purposes only and do not affect the calculation of the data.
Also, read compare project schedule using Primavera P6 Visualizer.
Displaying the Baseline in the Activity Table
You can display the Baseline that you have previously created. To display Baseline, do the following:
- Go to the Project menu -> Assign Baselines…
- In the Assign Baselines window, there are 3 column options, namely Primary, Secondary, Tertiary.
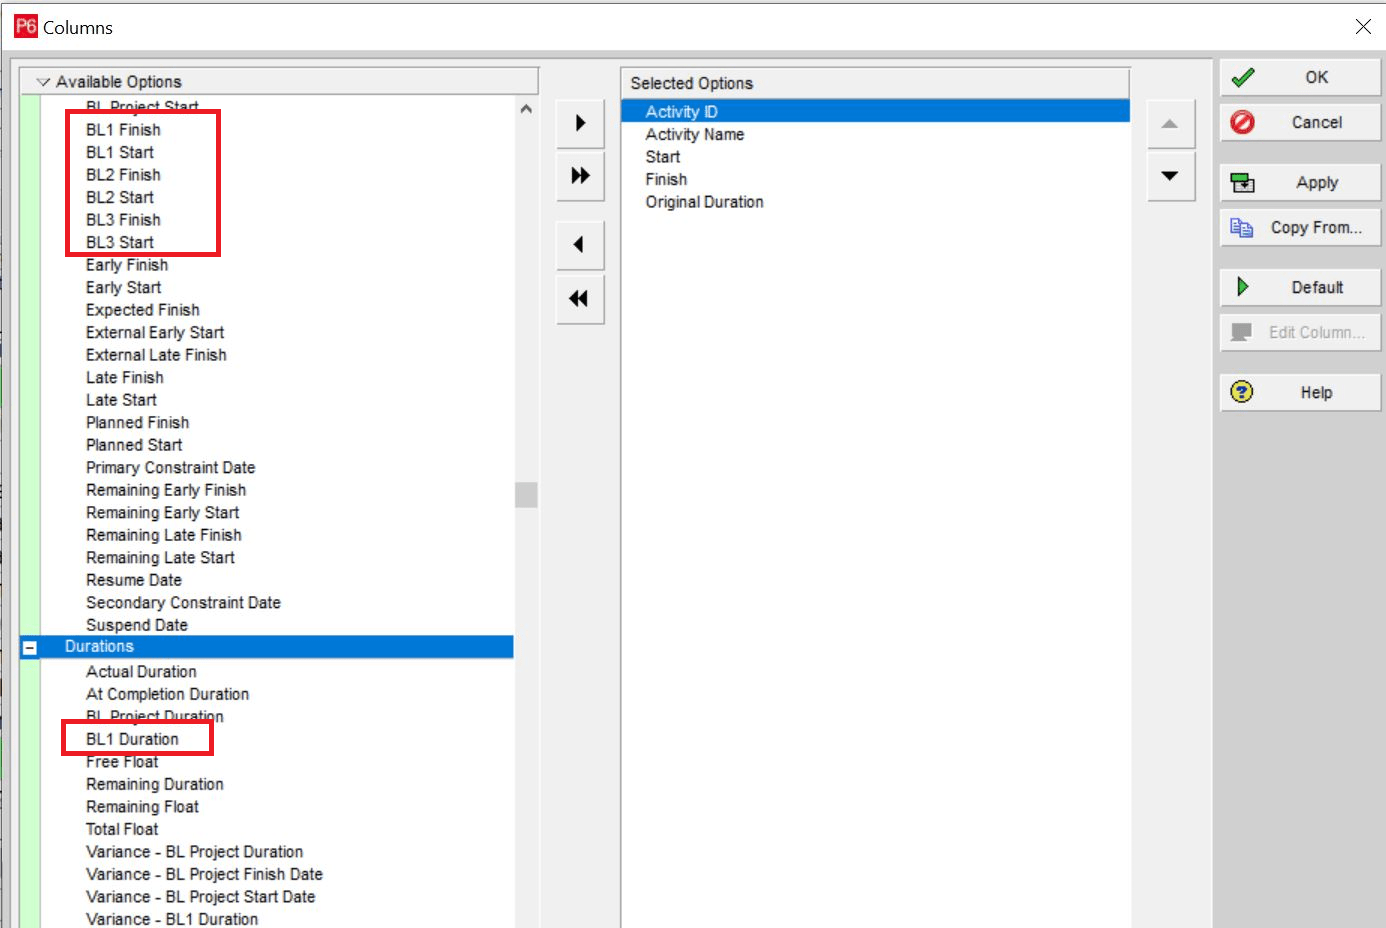
- In the Activity table, the Primary column will correspond to the BL1 column, the Secondary column will correspond to the BL2 column, the Tertiary column will correspond to the BL3 column. Look at the image below.
- It appears that Primavera only provides Duration for column BL1, namely BL1 Duration. For the Duration of BL2 and BL3, it is necessary to make a formula if you want to add the duration column (also, read how to create formula in primavera).
- Next, select the Baseline you want to display in the Primary column.

- Once selected, click OK.

- Then, you can display the Baseline by adding columns BL1 and BL1 Duration.

- Column BL1 will appear in the activity table.
- You can make changes to the Start and Finish fields. However, your Plan (Baseline) data is still stored, which you can see in column BL1.

Displaying the Baseline on the Barchart
To display the Baseline on the bar chart, do the following:
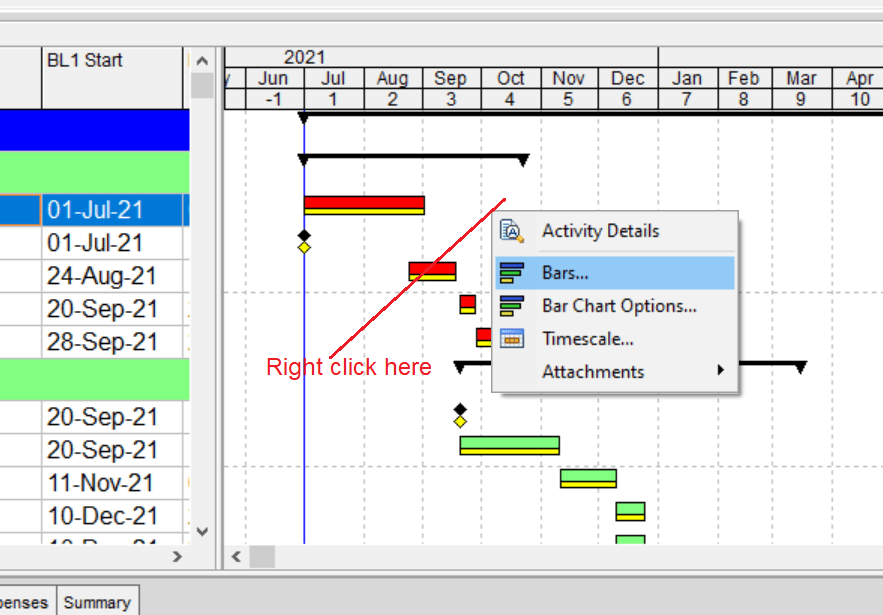
- Right-click on the Bar section. Select the menu Bars…
- Next, in the Bars window, click the Add button. Make sure the Display column is checked. In the Name field, give a name as you wish. In the Timescale column, select Primary Baseline Bar. In the Filter column, leave all selected (All Activities). You can also do filtering as needed.
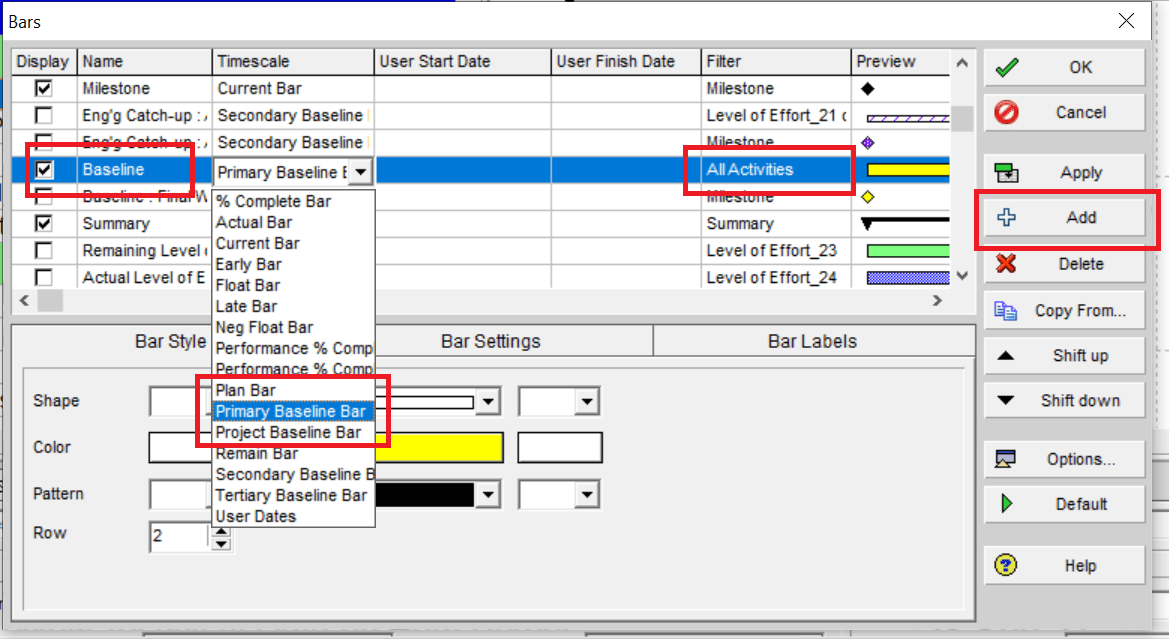
- When finished, click OK.


